
NOAH QA is a testing instance of your NOAH AMS and website. When Cannolai adds new custom functionality for your organization, we will put it here first so you may validate it. If you want to test standard NOAH functionality before rolling it out, you can do that here as well. Since this includes a QA version your website, you can also setup designs and test modules here first before applying to your LIVE site. The NOAH QA AMS data is periodically refreshed from your LIVE AMS instance, and that refresh can be done upon request.
In order to access NOAH QA, you will need to perform this setup on each staff workstation that needs to access either the NOAH QA AMS or website. The reason you have to update your workstation settings is because this environment is on a private server and not accessible to the general public. There are different setup steps for PCs and MACs.
NOTE: Many IT departments have locked the needed file to Administrator access only, so your IT department may need to do this for you.
[[ko-topic:61f40f2f307cd067537b2403]]
PCs
The following steps will add two entries to your PC workstation's hosts file for the IP addresses provided by Cannolai.
- First, go to your Notepad application wherever it is in your program menu.
- DO NOT OPEN IT.
- Right click on it and, in Windows 10, select More, Run as administrator; in Windows 8 or Windows 11, select Run as administrator.
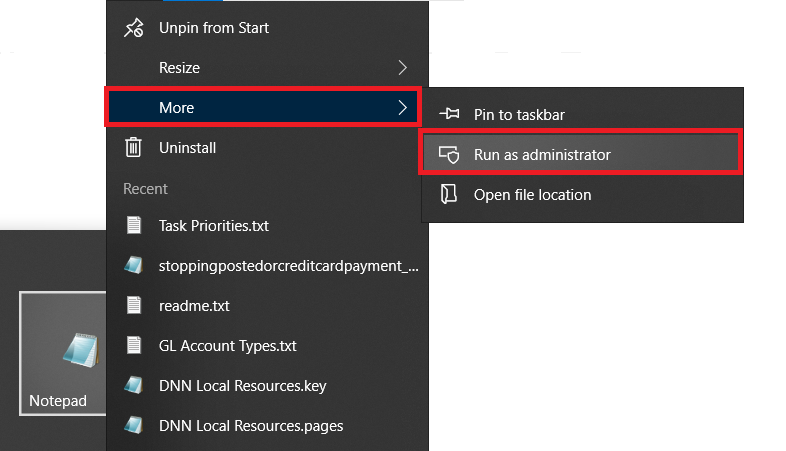 Windows 10
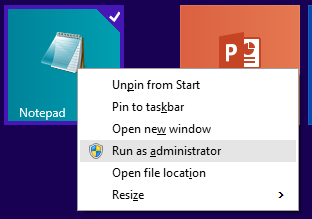 Windows 8
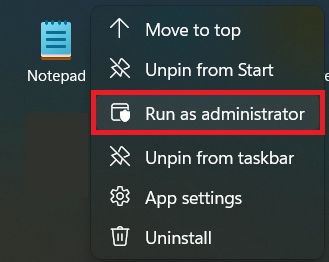 Windows 11 You may get a warning message about making changes to your device, and you want to allow that.
- Next, Notepad will open, and you will select File, Open.
- Select “All Files” at the bottom right of the window instead of "Text Documents"
- Browse to C:\Windows\System32\drivers\etc.
- Select the file named hosts to open.
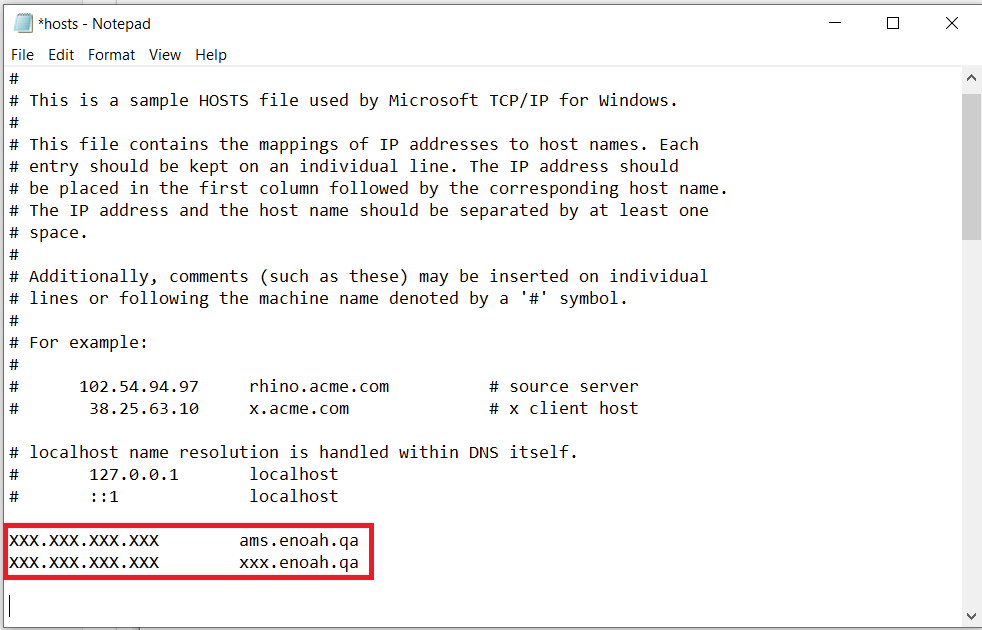
- You will see something similar to the screenshot below.
- NOTE: All lines that begin with the pound sign # are comments, thus don’t enter the ‘#’ on the lines with the IP addresses and host names provided by Cannolai.
- You will need to enter just a single line for each IP and host name.
- Paste these in under any current entries and comments.
- Your specific IP addresses and host names will be for your organization and supplied by Cannolai. XXX.XXX.XXX.XXX ams.enoah.qa
XXX.XXX.XXX.XXX xxx.enoah.qa - Click File, Save to save your changes.
Once you have saved your hosts file entries, you should be able to go online and navigate to the NOAH QA AMS by going to ams.enoah.qa. You will see the login page if you are set up properly.
Macs
The following steps will add two entries to your Mac workstation's hosts file for the IP addresses provided by Cannolai.
- Launch Finder, select Applications, double click on Utilities, double click Terminal
- In the Terminal window and type
sudo nano /etc/hosts
on the command line, then hit return. - You will be prompted to enter the administrator password.
- Add the 2 lines supplied by Cannolai at the bottom of the current text, the IP and host name should be separated by a tab character (after typing in the IP address, use the tab key before typing the host name).
XXX.XXX.XXX.XXX ams.enoah.qa
XXX.XXX.XXX.XXX XXX.enoah.qa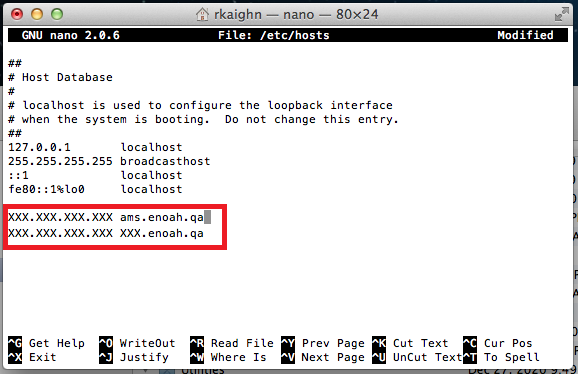
- Type Control O and then Return to save the file, and Control X to exit.
- Back on the the command line in Terminal, type
sudo killall -HUP mDNSResponder
then hit return to clear your Mac’s DNS cache and prevent any clashes between DNS and the Hosts file.
Now you should be able to go online and navigate to the NOAH QA AMS by going to ams.enoah.qa. You will see the login page if you are set up properly. The first troubleshooting option is to restart your Mac to make sure the new settings are loaded.
NOTE: When using the Reporter in QA and viewing Exports, you may see an error that the file can't be found. This is usually because the application is trying to use https:// and we are not able to get a security certificate for this internal server. If you receive this error in QA, please try updating the URL to use http:// instead.