
Here are step by step instructions to add the Conference Module to your website.
- Create your web page.
- Set the page settings to the appropriate view (i.e. admin/content editor only, hide in menu, etc.). You will probably not want to have this visible until you are ready for people to register.
- Drop the NOAH Conference Module on the page.
- Set your Module Permissions (Can match the page settings).
- Edit the module by going thru Pages, Advanced, Modules and clicking on the gear next to the NOAH Conference Module
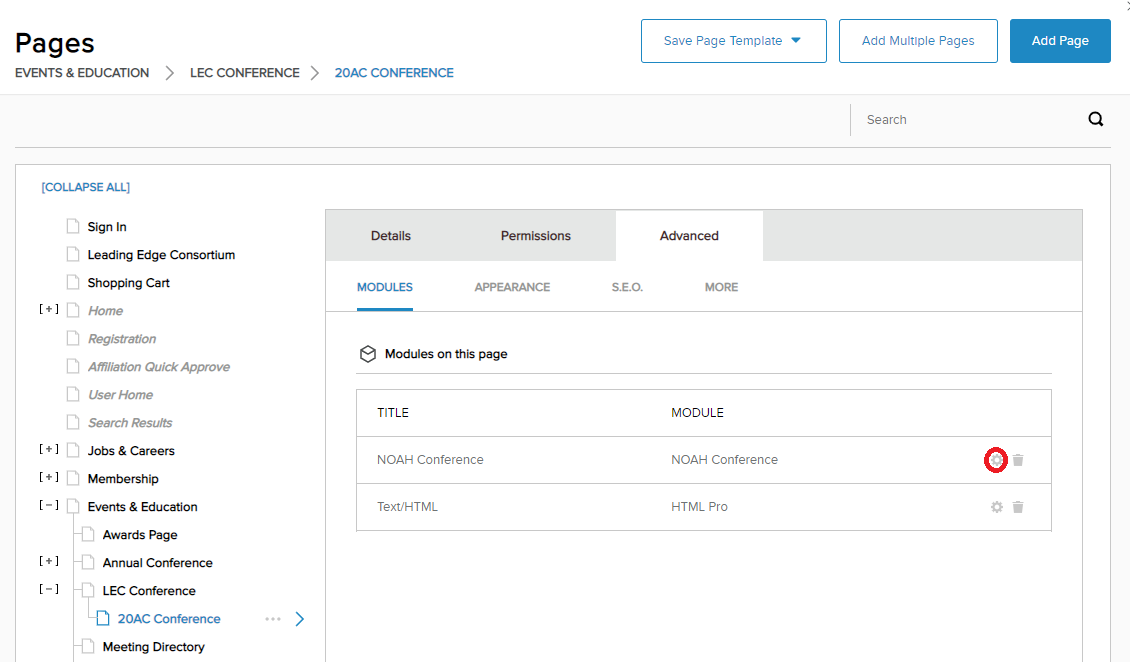 NOTE: Editing the page and clicking on the Settings of the module will not work well.
- On the last tab in the module, NOAH Conference Settings, this is where you will set up your conference.
- Select your meeting from the first drop down and the registration event from the second drop down. NOTE: all your subevents must be set with “on the web” turned on to be visible in the conference module.
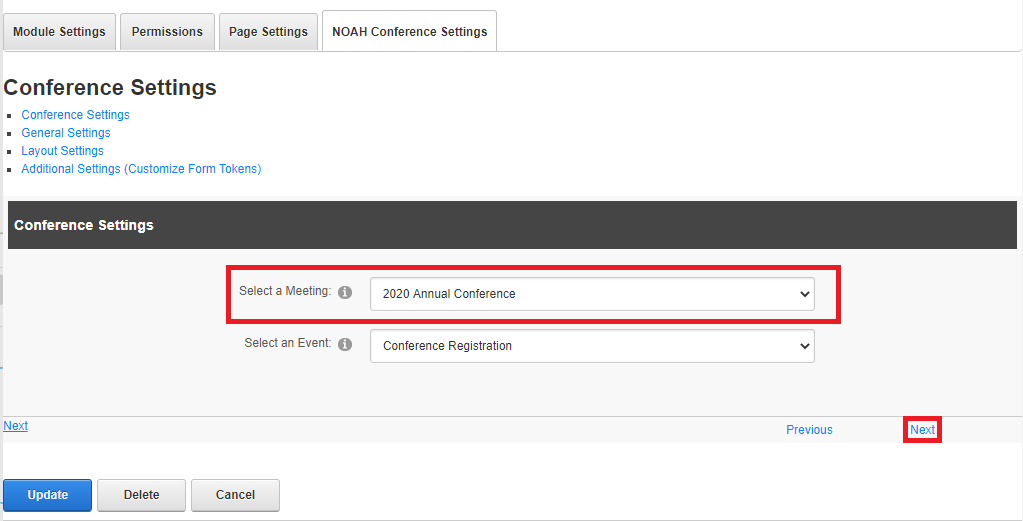
- Select Next to go forward in the module to the General Settings.
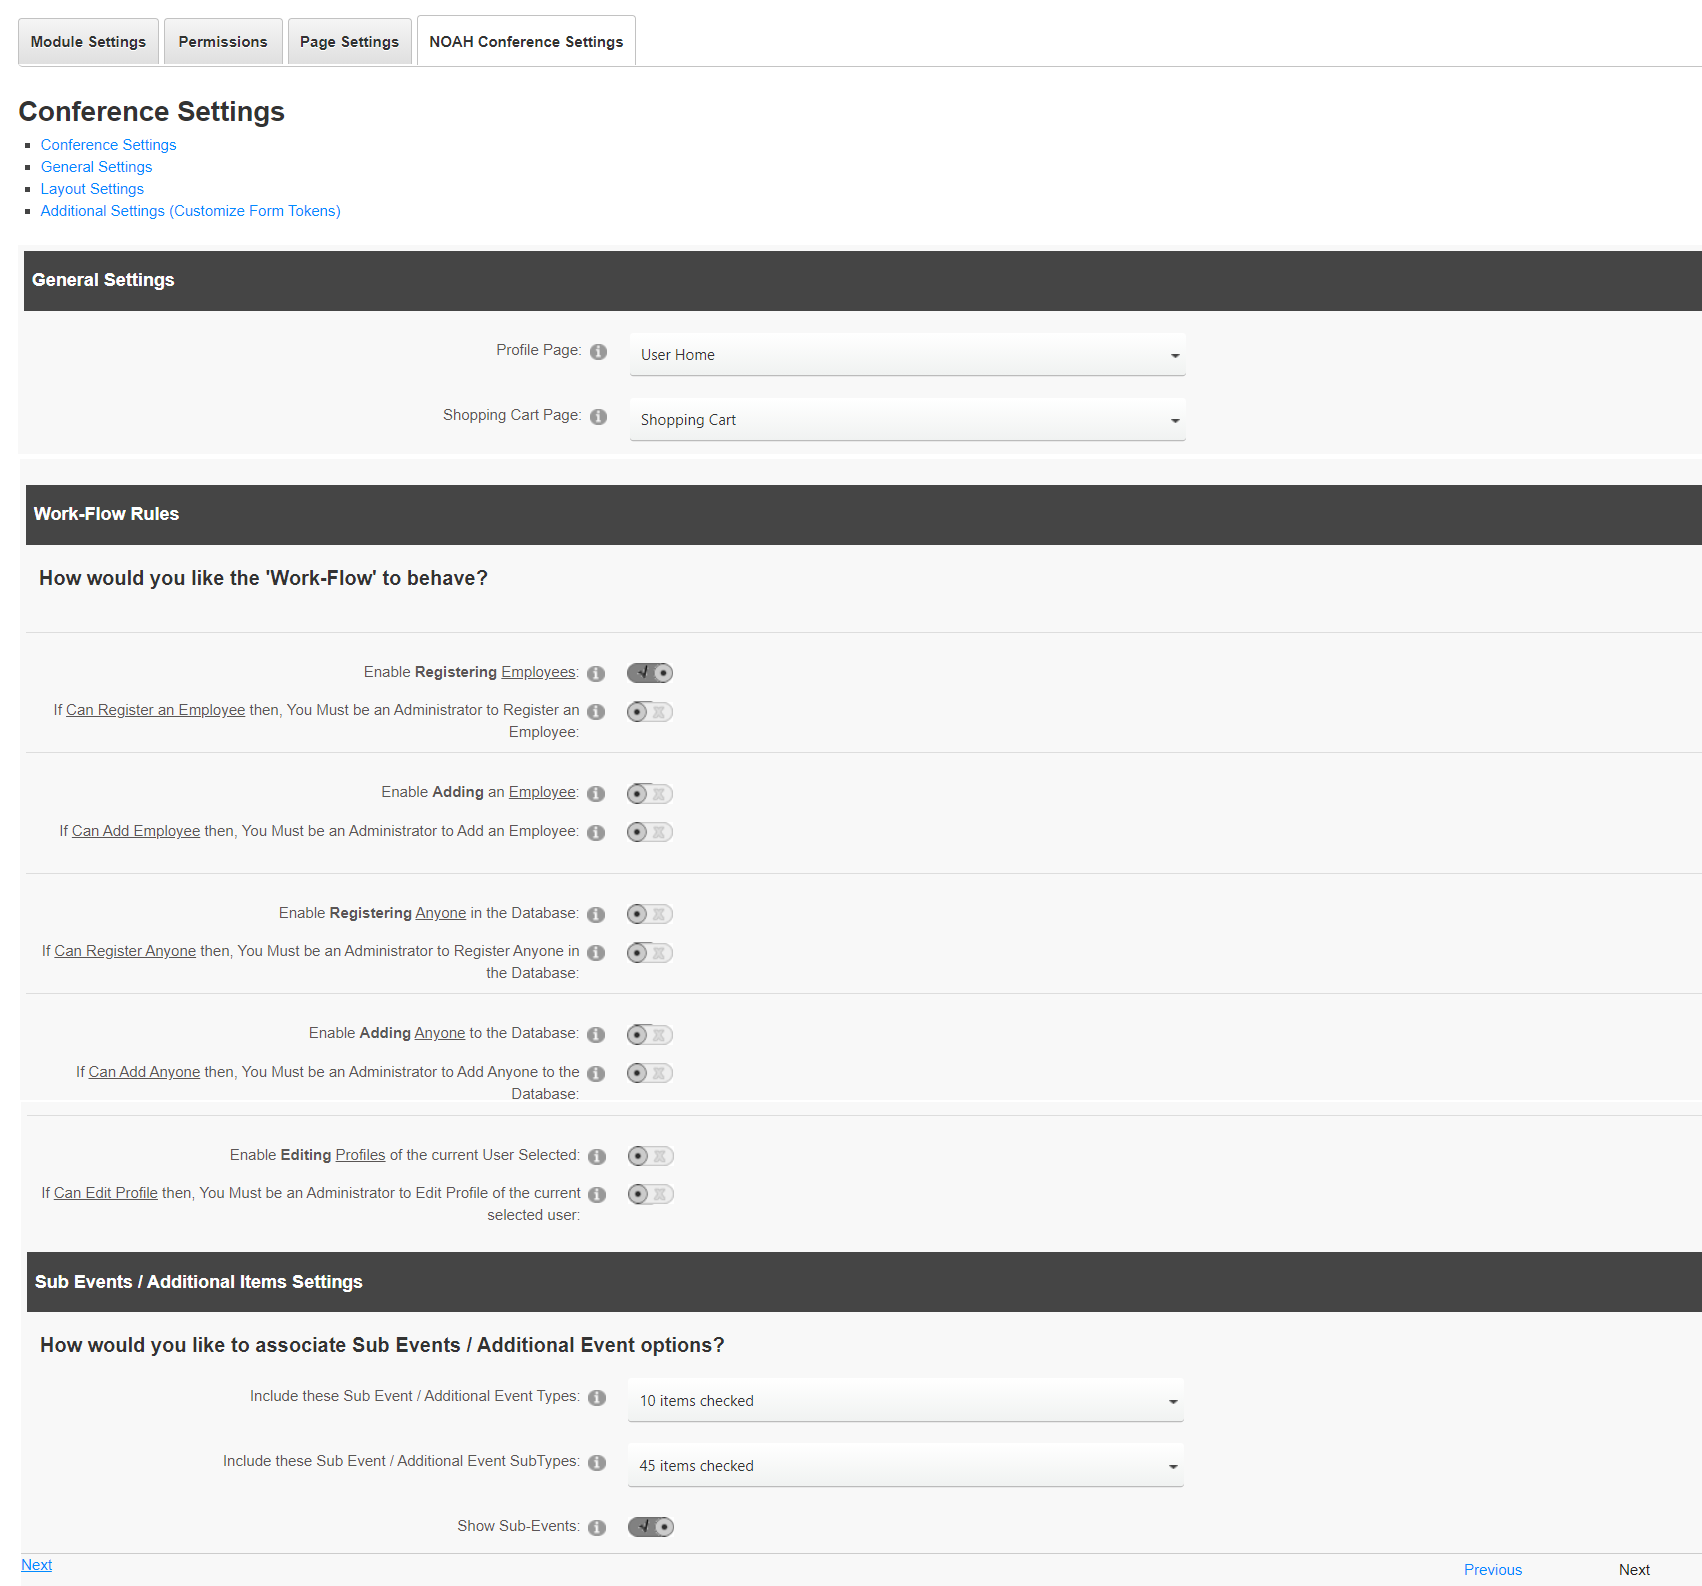
- Set your Profile Page and your Shopping Cart Page (these can vary by client).

- Select your Work-Flow Rules, which includes how registrations can be processed (by employees of a company, admins only), who can add people to the database and register for others, and if you allow bypassing the main registration for all additional events.
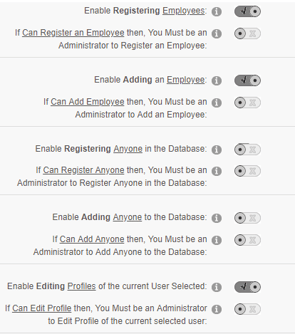 The first toggle, Enable Register Employees, allows users to register others from their company. If you want to limit that to Administrators, use the second toggle.
The next set of toggles allow Adding an Employee, and that can be limited to Administrators.
Similarly, the next two sets of toggles are for Registering and Adding Anyone.
The next set of toggles allow Editing Profiles.
- You can toggle on and off Sub-Events in the next area, you just need to set the toggle and select the event types and SubTypes to show. The text of the drop down will show how many you have selected in each area.
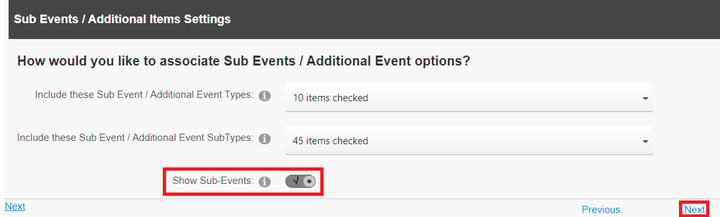
Select Next to move forward to the Layout Settings. - The Layout Settings is to populate the tabs that encompass areas of the Conference Module.
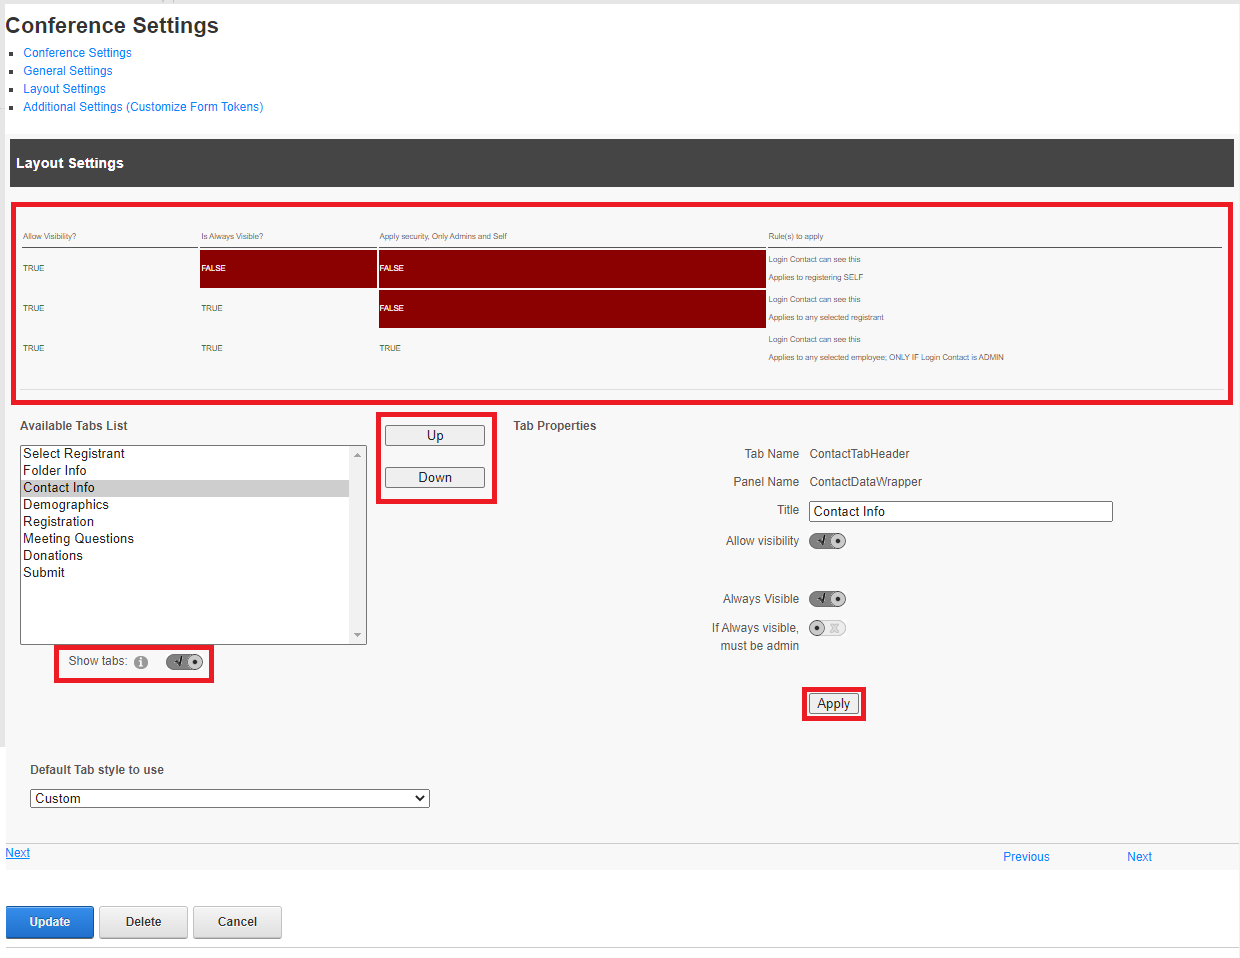 You can reorder these tabs using the Up and Down buttons, and change the titles, hide and show them under Tab Properties to the right. The table at the top of the screen describes what the various visibility options mean for a given Tab.
The available Tabs are- Select Registrant- pick who is being registered, the logged in user, or a co-worker, or someone else.
- Contact Info- an opportunity to update the registrant's name, address, phone and email.
- Demographic- an opportunity to update the registrant's responses to questions.
- Folder Info- must be configured separately, but can be used to update affiliations of the registrant.
- Registration- selecting the meeting registration options.
- Meeting Questions- questions asked specifically for the meeting. NOTE: only questions on the Registratn event are shown.
- Donations- an opportunity to accept donations from the registrant.
- Submit- making the purchase.
Visibility controls who sees the tab. Allow visibility means it will show for the logged in user. Always Visible means it will show when registering other contacts. If Always visible, must be admin means only company Administrators will see the tab when registering other employees. For example, if you didn't want users to see other contact's demographics when registering them, but still see their own, you would have Allow visibility enabled, but Always Visible would not be enabled for the Demographic tab.
Remember to click Apply for each tab as you make changes to its properties. Click Next at the bottom to move to the next section.
- The next area is the Terms & Conditions. You may use HTML formatting in the text area. You can also change the Acceptance Message, displayed next to a check box.
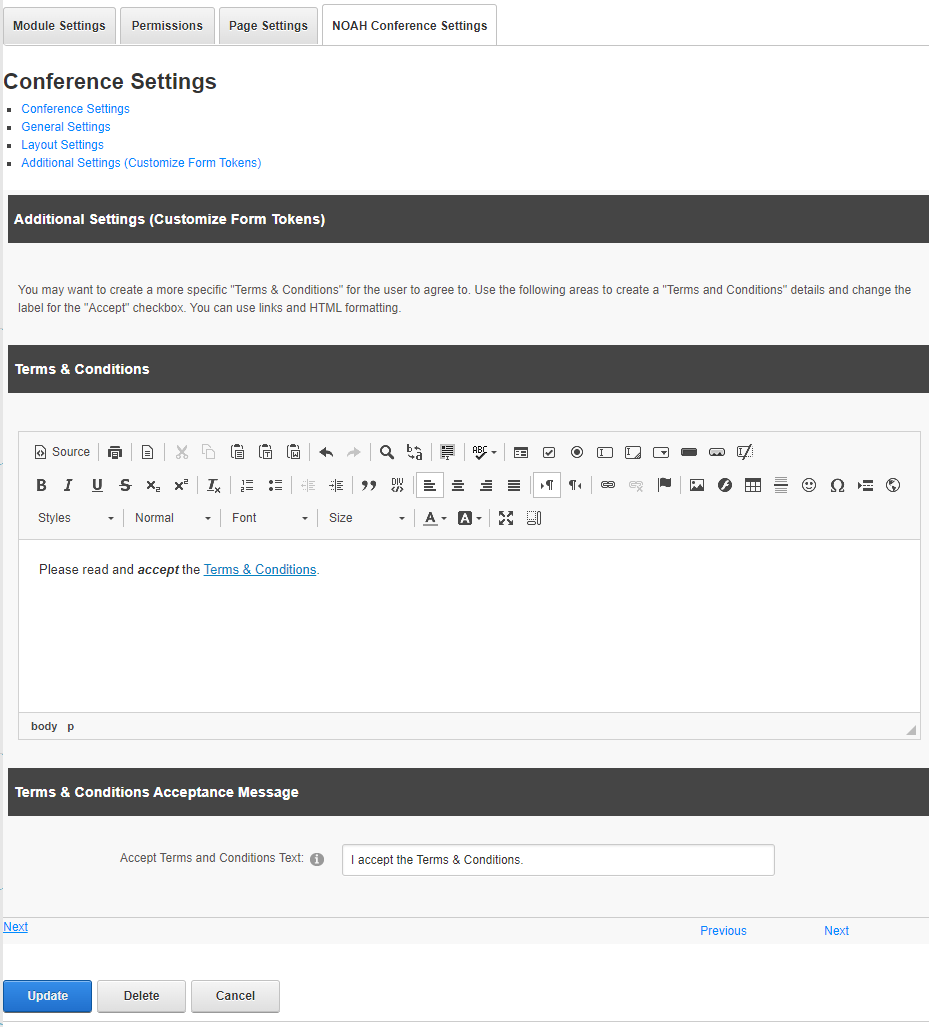
NOTE: Most clients do not use a hyperlink to their Terms and Conditions as that opens another page and users may have a hard time navigating back. If you do include a hyperlink, you will probably want it to open in a new window so when a user closes it, they are back where they were in the registration process.
When you are done making all your changes, select Update.
Tips and Tricks
- Go through the module once and only set up the event and don’t make changes to the tabs or any other settings. After you get the base module setup, then go in and make your changes.
- Because this module loads data from the logged in user's AMS contact record, it can take a long time to load when editing the control. If you have this issue, you might try creating a DNN user that is an Administrator, but not tied to a record in the AMS. This way you can edit the control without waiting for the contact data to load.
- A recent update to this module allows it to be used on different pages for the same event. This way you can have difference experiences on different pages, for example different tabs and optional events.