
The AMS includes a Badge Designer that lets you edit and create badge templates as needed. For those of you who use custom badges in the AMS, note that those cannot be created and edited in this Badge Designer.
Badge Name is a drop down field for program codes in the AMS where you select the type of badge you wish to create for meeting attendees based on their registration fee. Examples of types of badges are Standard, Speaker, Exhibitor, Sponsor and Guest, as seen in the next screen shot of a specific program code from the registration event for our sample annual meeting.
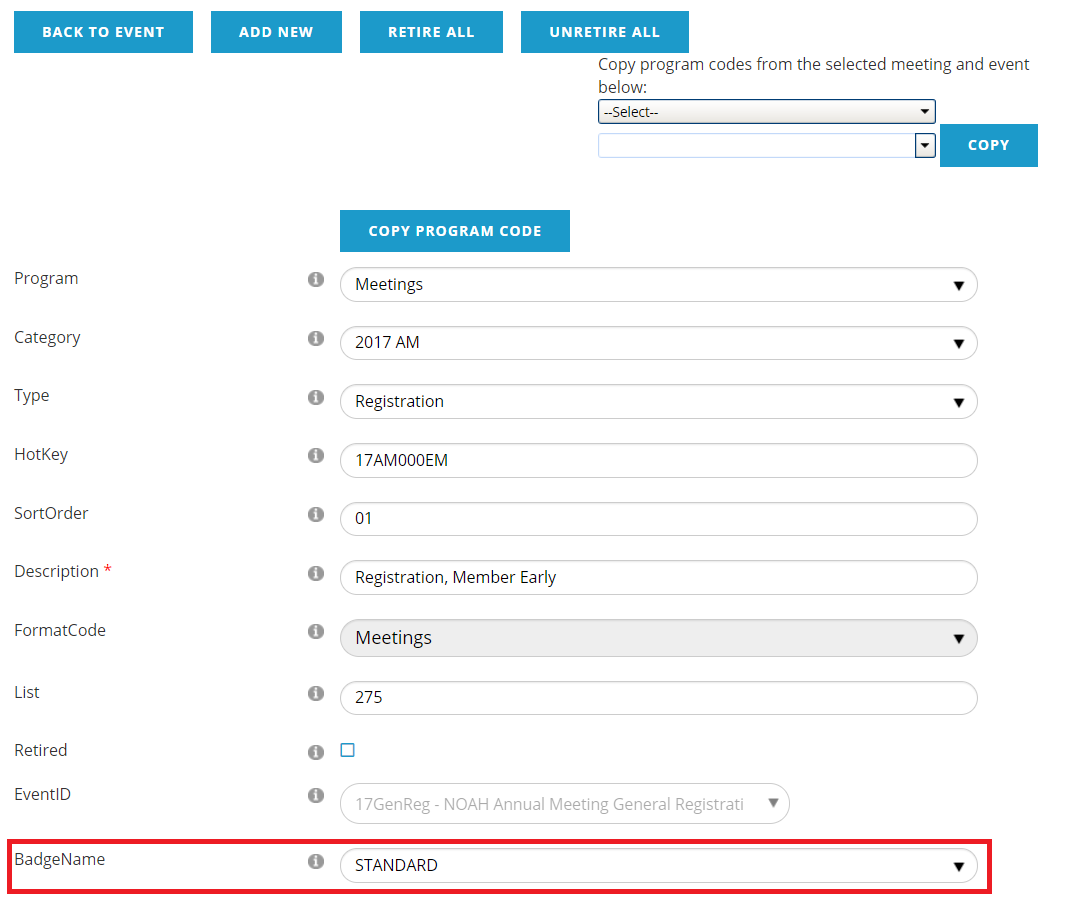
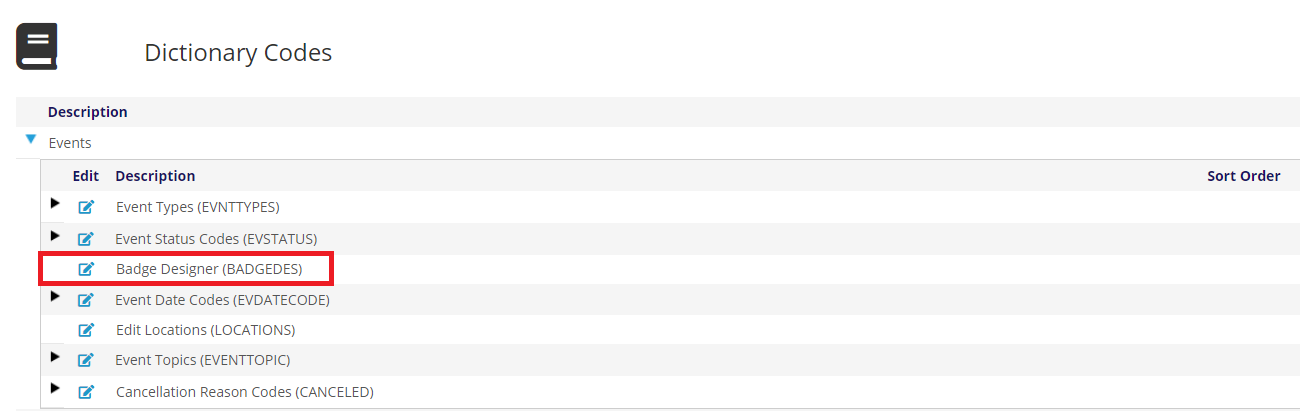
Each one of a registration event’s program codes must be assigned a BadgeName in order for a badge to be created for each registrant. The Badge Designer is where these badge layouts are created and edited. It does not involve GroupTypes, GroupCodes or MasterCodes but since it defines badge template layouts it is included in the Meetings Dictionary. To open the Badge Designer, click on the  edit icon to the immediate left of the Badge Designer Description field as seen in the next screen shot.
The resulting view is seen in the next screen shot.
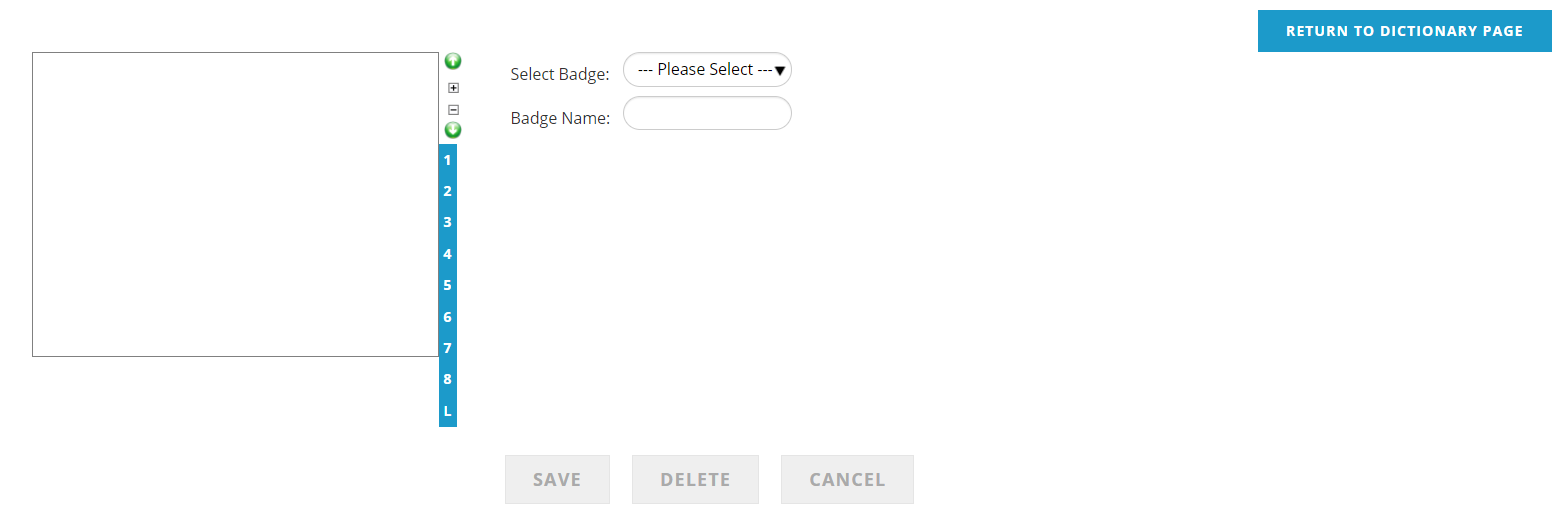
Clicking on the Return to Dictionary Page button, which remains on the page after a badge template is loaded, takes you back to the Meetings Dictionary menu page. If you make changes to a badge and click this button before hitting the Save button, the changes will not be saved.
The Badge Designer includes a library of badge templates. You can modify an existing template or create a new template by cloning and editing an existing template. The Badge Designer allows you to indicate what data to pull from a registrant’s record or registration and where to print it on their badge for each template.
To access a badge template, click in the box for the Select Badge field to open the drop down menu. Click on the name of the badge you wish to view or edit, and the resulting view for our sample STANDARD badge template is in the next screen shot.
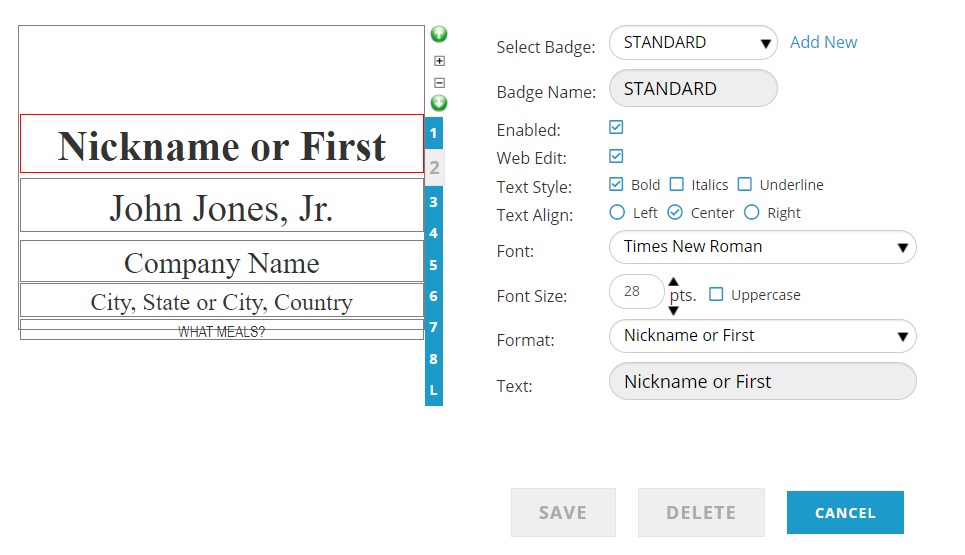
On the left is a preview of the badge layout which updates to reflect any
changes made to the settings on the right. There are eight lines of data that you can define to be pulled from the database, numbered from “1” to “8” down the right side of the badge layout. There is also a logo line, indicated by the “L”, if the logo is printed with the data on the badge, and indicates where to print an image file relative to the other data on the badge. There are other ways to incorporate logos on a badge, as in our example above, where line 1 has no data but leaves enough room for a pre-printed logo.
Note that it is difficult to use all eight lines and have the badge still be legible but there are eight data fields available to allow flexibility across all of the templates. Click on the row number or in the line itself to view or edit its settings. The selected data field is outlined in red and the line number turns from blue to white, so make sure you have selected the correct line before making any changes.
To Save any changes to a badge template, click on the Save button on the right, below the badge preview. To exit a template without saving changes, click on the Cancel button, but be aware this will cause all changes since the last save on any of the badge lines to be lost.
The Format field is where the data is selected from the AMS library for each line via a drop down menu. It is the next to the last field on the right, but is the first field that should be selected or changed when adding or moving data on the badge. This drop down will be populated with many options based on your data in the AMS, and those available in our example for our sample company are in the next screen shot, as selected for line 2.
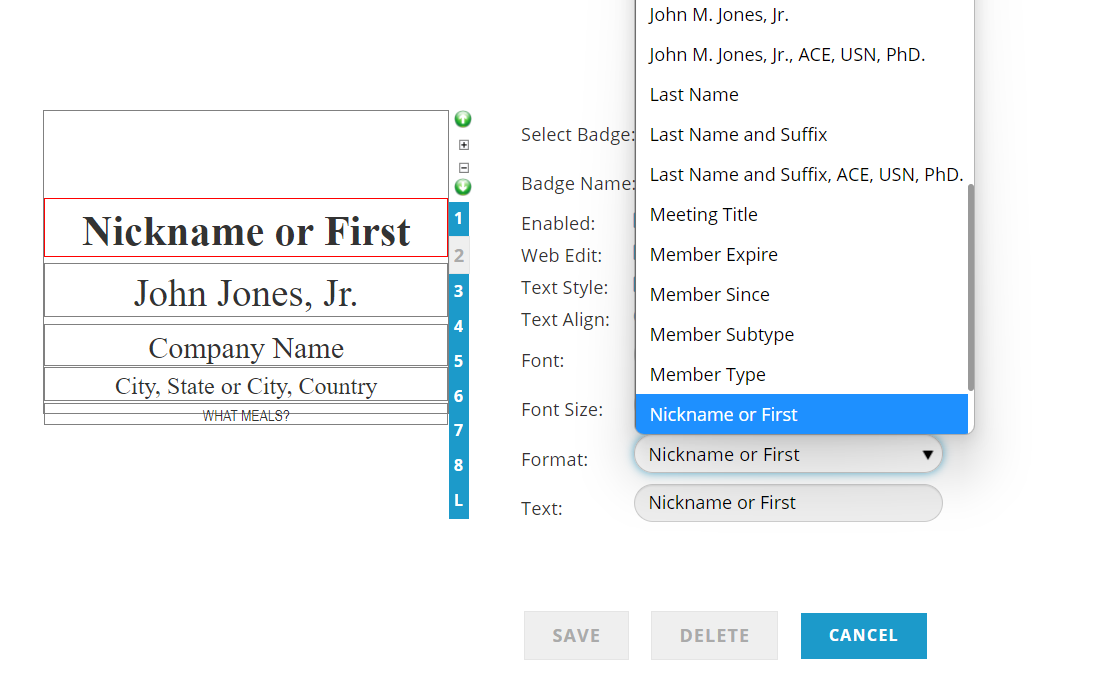
Once a data definition is selected for the Format field, the name of that format will appear on the corresponding line of the badge so that you can confirm you are placing the fields where you want them in relation to one another.
There is a “Use the text below” option for this field which when selected, will put the text entered in the Text field, found immediately below the Format field, on the selected line of the badge. When this option is selected, the badge preview will update with “Use the text below” appearing on that badge line until the desired text is entered in the Text field and saved. You can use this to add the word “Speaker” or “Presenter” to a badge template as an example.
Additionally, there is a data definition called “HotKey to print value” that pulls text from the registration program code to automatically populate a badge line based on the registration fee paid. Examples of its use are to add the words “Non-Member” to the badge for non-member fees, or “I Saved $” for early bird fees. See the Program Codes section of the Meetings Chapter for more information on Program Codes.
The Enabled check box must be checked for the highlighted line of the badge to be included in the selected badge template. An existing line cannot be deleted, but unchecking the Enabled box will remove it from the badge template.
Web Edit is a check box that when checked allows the registrant to edit that particular line of their badge when the registration is purchased via a preview of their badge that appears when checking out from the shopping cart. The most common use of Web Edit is with the line for “Nickname or First” data. Any changes made are saved to their badge, but only a nickname change is saved in the database which is then used on all subsequent badges. No other edits are updated in the contact’s record. NOTE: Meeting badges are shown after the registration(s) are purchased online and a user can edit badges they have purchased; this is the only time a user can edit badges, but staff can edit at anytime.
Text Style is a set of three check boxes can be enabled to make the text of a badge line bold, italicized, underlined, or any combination of those options. Checking any of these boxes will apply the selected option to the name of the data field for the corresponding badge line so that you can see what your change looks like and how it would appear once actual data is pulled for a badge.
Text Align is a set of three radio buttons field that let you place the text of the badge line to the left, center or right within that line. Checking any of these boxes will apply the selected option to the name of the data field for the corresponding badge line.
The Font field is a drop down list of fonts that can be chosen for the badge line. The Font Size fields lets you select the font size for the badge line and the adjacent Uppercase field is a check box that makes the text all uppercase letters.
When the Select Badge field is filled, Add New appears in blue letters to the right of that field. The Add New function lets you create a new badge template by cloning an existing one. You cannot create a new badge from scratch, so be sure to first select the existing badge template that most closely resembles the one you wish to create, then after that badge preview has loaded, click on “Add New”. The name of the existing badge template will be automatically entered in the Badge Name field, as usual, but in this case you will be able to and should immediately edit the name to that of the new badge template, then click Save which appears in blue letters to the right of the Badge Name field before making changes to any other fields. If a new template is created by mistake, click on the Delete button to the right of the Save button. If the badge template has already been used, it cannot be deleted.
Custom badges can be built as needed for a fee, for example for those badges that should be printed to include an itinerary, course numbers, room numbers, education credits or other data that can be pulled from the AMS. There are many options to choose from for custom badges. As was stated at the beginning of this section, if your association uses custom badges, changes cannot be made via the Badge Designer in the Meetings Dictionary.
Badges are built by the system when the registration is checked out of the shopping cart. If a badge template in use for a meeting is edited after registration has opened, those changes will not be applied to those badges that have already been built. If changes to badges need to be made after registration has begun, there is a Rebuild All Badges function that can be run by JL Systems' staff prior to the printing of badges.