
The Reporter can provide a report with Counts of the records that your query has pulled. The records can be grouped based on the options available in your system, such as member group & type, country or state.
If you want refreshed results from your query make sure you have clicked the Run this Job button. If the number returned seems correct, select “Counts” in the “Output Product Selections” drop down menu, then click on the New Product Setting button.
Then a new page for Counts output will appear.
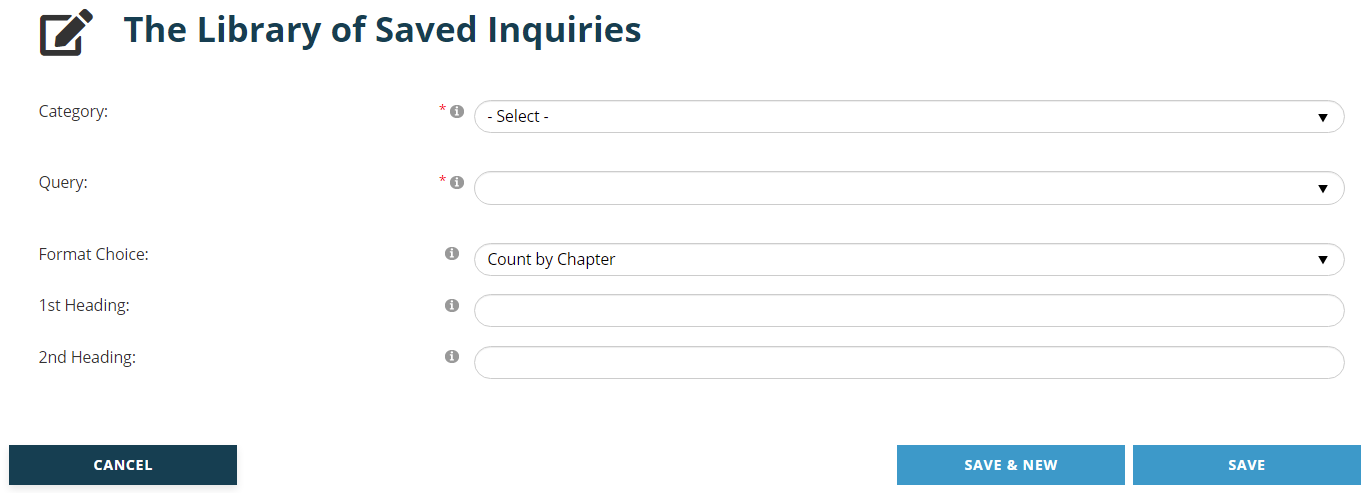
The Category and Query fields are mandatory drop down menus where the category is a parent, and its children are the queries. The choices you make in these fields determine which of the library’s pre-defined data sets you will get back in your output. You have access to options that are standard in NOAH, as well as any that were custom created for your association.
Your selection in the Format Choice field determines how the counts will be grouped. Sample options for this drop down menu are in the next screen shot.

The Format Choice you select will appear at the top of the Counts report.
Type a brief description of your output into the 1st Heading textbox and, if needed, a sub-header in the 2nd Heading textbox. These headers do not appear on your Counts report, they appear in the output page grid for the Library Card you are using. Since the output you create can be used more than once, it is recommended that you have at least one header that describes the purpose of the output, thus making it easier to find it in the grid in the future.
Click on the Save” button to save any changes made. Click on the Cancel button to exit the page and discard any changes made. Click on the Save and New button to save the Counts output you have been working on and then immediately start creating a new Counts output for the same Library Card.
Once you have hit the Save button the page will reload in View mode so you can review your work before creating the output. This View page can also be accessed via the output landing page grid when you click on the  magnifying glass icon found to the far left in the row of the output product you need to review. An example of the resulting View page for a sample Counts output product is in the next screen shot.
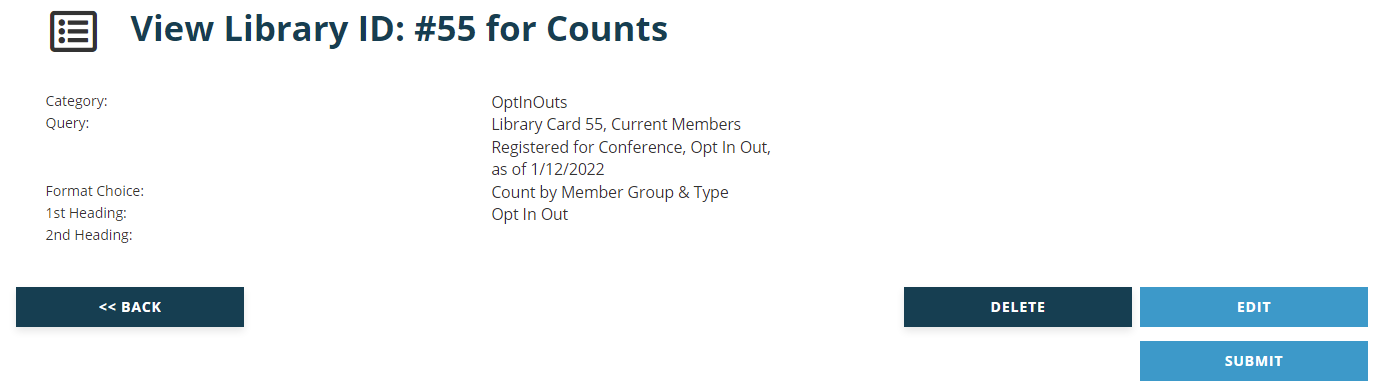
This view includes the Library Card ID number at the top and each of the fields described above, followed by the entries for each.
The Back button returns you to the Output landing page grid for this Library Card.
The Delete button only deletes this particular output product. The Library Card remains intact as is, as well as any other outputs listed in the output page grid.
The Edit button switches the page into edit mode for the counts output currently on view.
When you are ready to create your Count report, click on the Submit button. If you have successfully requested the report, the message Successfully submitted job to the queue will appear under the buttons.
Then click on the My Reports button, found at the top right of the page.
 The page will reload with a grid of the Reports, Counts, Labels, Lists and Exports that you have run from any Library Card under your login. Information on using this grid to view your count report is in a separate section.