
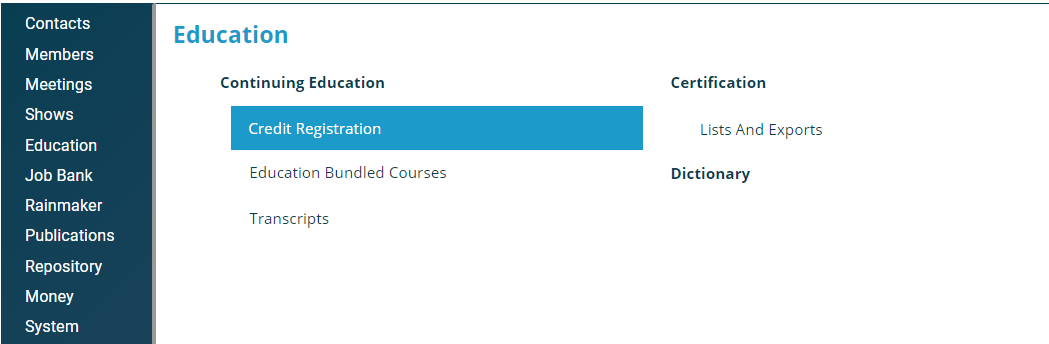
Once contacts have attended your events and courses, you will need to assign the credit to them. This is done in the AMS Menu under Education, Continuing Education, Credit Registration.
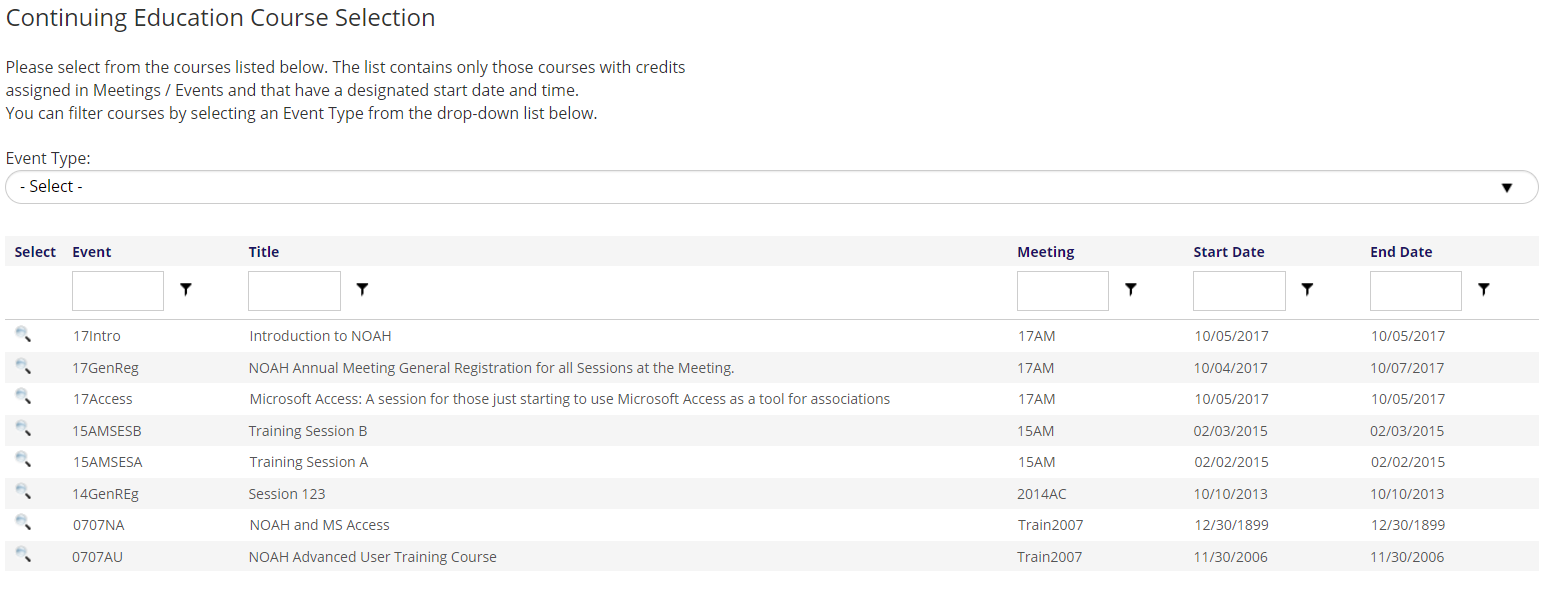
First you will need to select the event that you are assigning the credit for. Only Events that have Education Credits defined will appear in the grid. You can use the Event Type drop down and the filters in the heading of the grid to limit the results shown. Use the  select icon in the grid to choose the event you want to assign credit for.
This will open a new page where you can assign the credit for those registered for the Event and not yet received credit.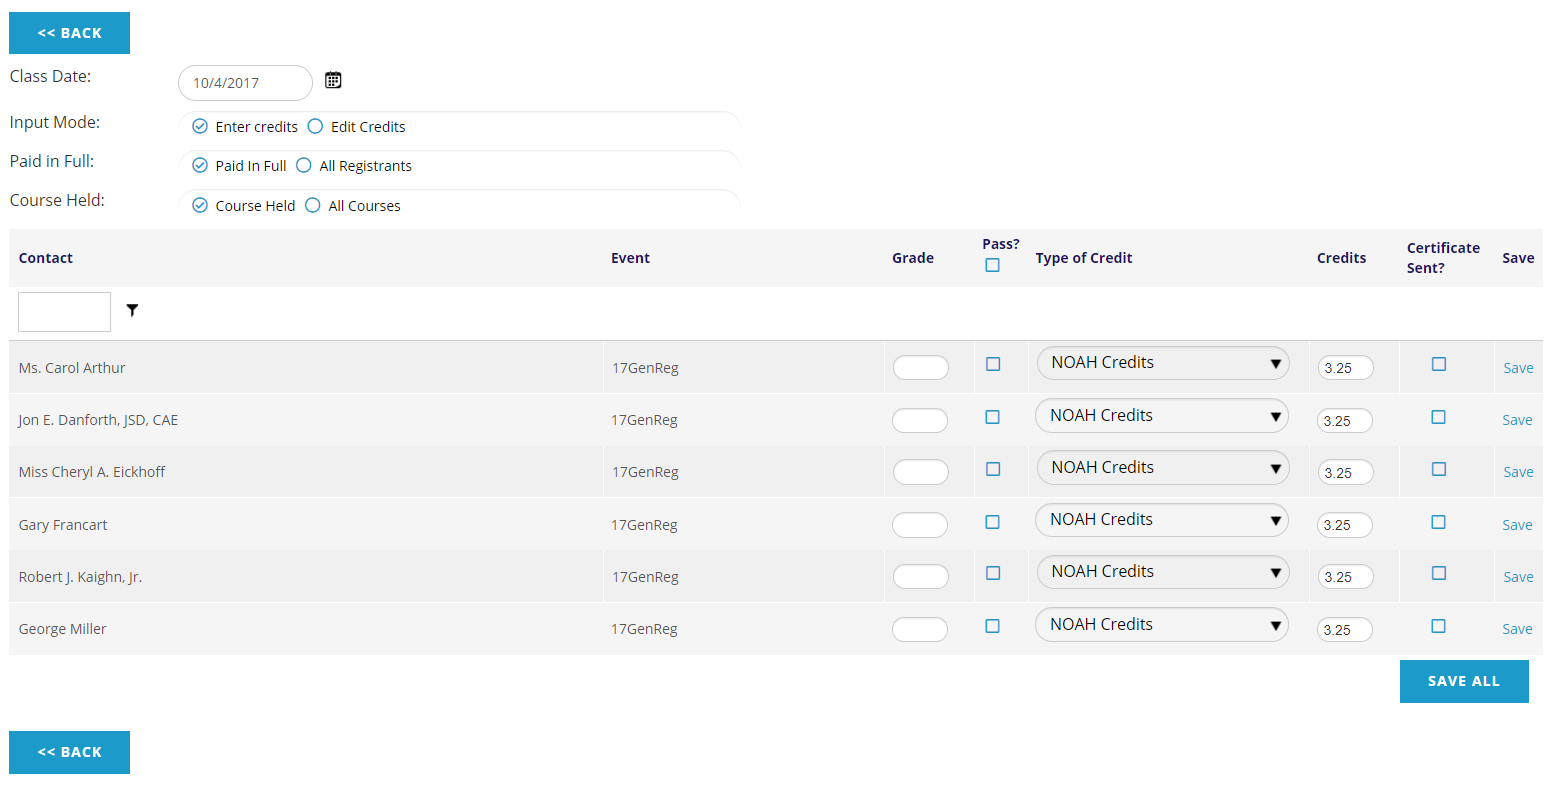
You can use the filter in the header of the grid, and the radio buttons above the grid to change what is shown in the grid:
- Class Date- if the course is held on multiple dates, you can filter to a specific date.
- Input Mode- choose between those where you need to Enter credits or those where you want to Edit Credits already entered.
- Paid in Full- choose between those who have Paid in Full or All Registrants.
- Course Held- choose between those where the Course Held already or All Courses.
When the Input Mode is Enter credits, for each contact, you can give a Grade, check the Pass check box, select the Type of Credit they receive, enter the number of Credits, and flag if they have had a Certificate Sent. As you complete each row, click on the Save button on the row to record the results. Checking Certificate Sent will save the current date for when the certificate was sent. If you want to change the date it was sent, or add the date at a later, you may do that by changing the Input Mode to Edit Credits. This also allows you to change other aspects of the granted credit.
In bulk, you can check the Pass check box in the header of the grid to check all the boxes shown, and you can also click on the Save All button to save all of the records that have credits entered.
To save a record as having failed, while viewing a group of people who have not been processed, optionally enter a Grade and click Save at the end of that row. If the Pass check box is not checked then a course record will be created with Passed = False (Failed), with the Grade entered if any. There will not be any credits created no matter what is entered into the Credits box. NOTE: This can only be done on a person-by-person basis as there is no way to actually mark the row as someone having failed, thus it cannot be done through the Save All button.
Failed records will appear using the Input Mode of Edit Credits and show as Failed without any credits. If you wish to reset them you can simply delete the record and the row will be put back in the Enter Credits group as they were. You can also delete the course record from the Education history on the contact’s profile.
Once a row is saved, the list then will narrow to just the individuals remaining to be processed. The Back button will take you back the list of events where you can select another to give credits.