
Document Categories serves two purposes, to connect the submission document to an object in the database and to allow for the uploading of companion documents as part of the overall submission document. For example, if you are creating an awards nomination form, you will want to add a category and type of an Awards Folder so that the system will create the folder and attach the completed form to it in order to track the nomination through the submission and review process.
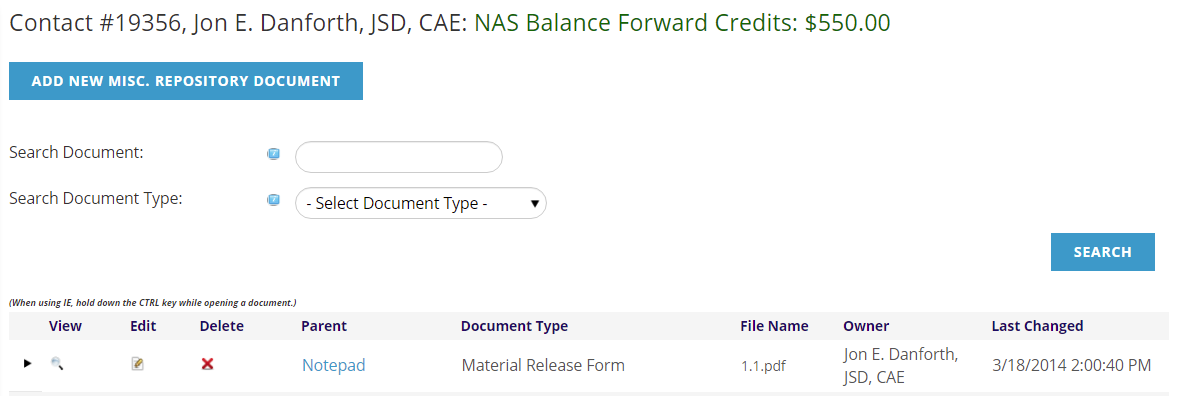
If your awards nomination form needs to allow for uploading companion or supporting documents, you can configure the upload process in this same section.
The Document Categories section appears under the Document Data section once one question has been created within a Submission Document in the Repository Dictionary.

In order to create and save a new submission document, you must make one entry under Document Categories. If you click on the “Update” button to save your new document before an entry is made in Document Categories, an error message will appear to remind you to create one.
Click on +Add new record at the top right of the Document Categories grid and then make selections in the mandatory Group Type and Group Code drop down menus, as seen in the next screen shot.
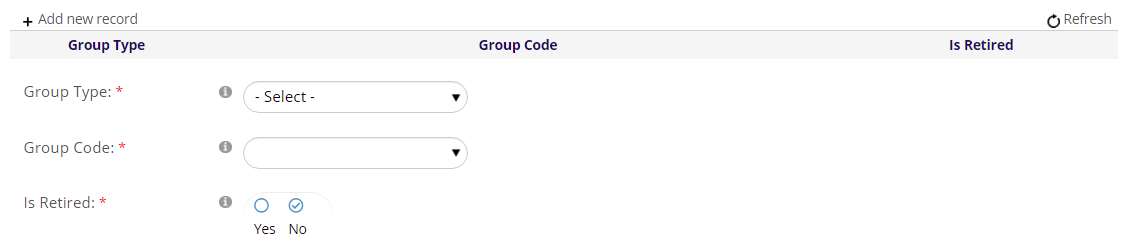
The mandatory Is Retired radio button field defaults to “No”, to indicate the submission document is active. When you are ready to retire the submission document, change this field to “Yes”.
Since an entry in Document Categories is required in order to save a new submission document you’ve spent time creating, it is a recommended practice to click on the Update button at the bottom of the Document Categories form to save these three initial choices, even if you plan to make selections for other fields in the same form. Once you have added your entry under Document Categories, you will be able to save the full submission document by clicking on the Update button that appears at the very bottom of the entire form.
It’s important to complete these steps to add a new submission document to the database as soon as possible. It can take some time to fill out the Document Data and Categories sections, and you don’t want to lose the entire document if a power or internet outage hits before you’ve saved it. Once the submission document is saved, you can go back into it in Edit mode to add to or edit any Document Data and/or Categories.
The Document Categories form is also long, so we will address it in different sections. Let’s start with the four fields that appear under “Is Retired.”

Photo Gallery Directory is a drop down menu field where you can select a gallery under website images in which to save a copy of the supporting files in the website as well as the Repository. This allows for easily displaying images of award winners as content on separate pages in the website without having to use the Repository control to find and display them. This field is optional unless a viewer slideshow/image view is being used, and galleries must be configured in your site in advance as part of your implementation.
Create Folder on Submit is an optional drop down menu field where you can specify a folder to be created upon submission of this document type. This is where you would choose the Awards folder if your submission is an awards nomination.
Associated Event is an optional drop down menu field that allows you to select an event that you want to associate with this document. The Presenter Center modules can be used for the submission process if you connect your document to an event via this drop down.
Reset to Status is an optional drop down field that defaults to “No Status Change”, which keeps the same code in place if the user modifies a submission document after submitting it to your association. An example of when you would want to update the status would be: If you allow a user to modify a document after they have submitted it, you could reset this status field back to “Staff Review”, so that you can verify that their submission still meets your requirements. If it does, then you would move it to “Review” to allow assigned reviewers to continue to review it if they had already been doing so. In this example you would change the drop down value to “Staff Review” to enable it to automatically update if a submitted document is changed by the user.
Document Categories is also the section where you can define a Main File Upload area if you will require the user to upload one or more documents to keep with the submission document, as seen in the next screen shot.
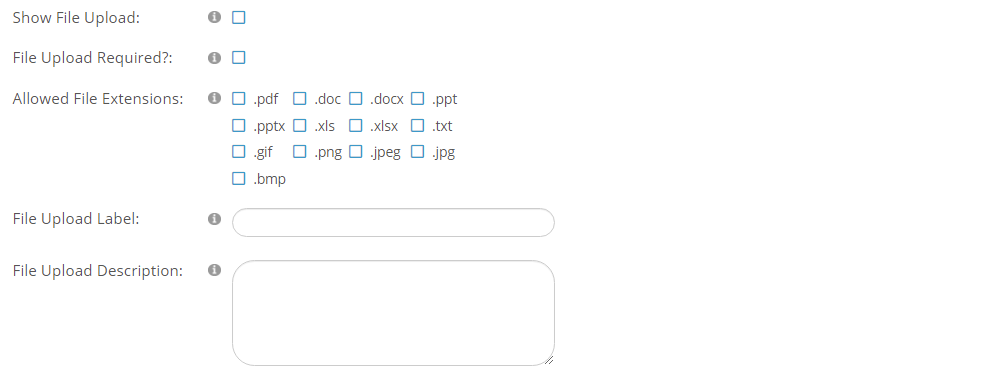
The Show File Upload check box defaults to unchecked. Check this box if you want to create an area in the submission document for the user to upload a file to be attached to their submission, such as a resume or a paper they authored, or a photo. This will track versions of the document uploaded.
The File Upload Required? check box defaults to unchecked. Check this box if you want to make the file upload mandatory for the user. If this is checked the user will not be able to submit until a file has been uploaded. If you are using the Presenter Center it will also list the document type description in the display checklist of requirements necessary to submit a presentation.
The check boxes under Override Allowed File Extensions default to unchecked, thereby allowing the user to submit any of the document file extensions you see listed here. NOTE: you should NOT select any of these check boxes if you do not wish to override the default file extensions listed as acceptable. If you want to limit the document file extensions that the user can submit for a particular upload request, check all of those you want to accept.
The File Upload Label and Description fields are not mandatory but you need to use them to provide text that will appear on the web form in the file upload section you have created, so the text you enter in these fields should make it clear what the user should upload.
An example of all of these fields in use is in the next screen shot.
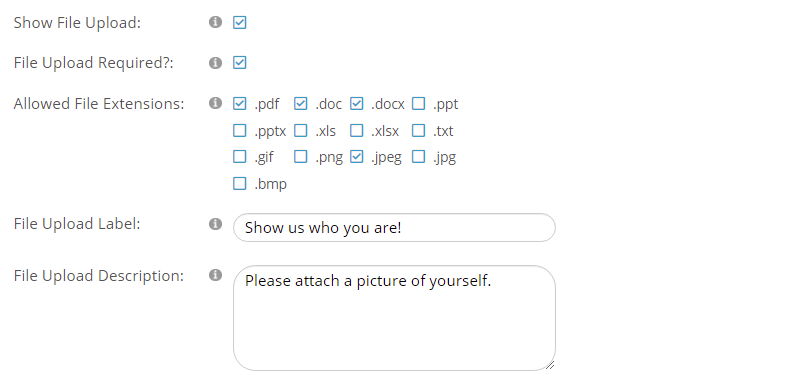
A sample of what the above example would look like to the user when filling out the web version of the submission form is in the next screen shot.
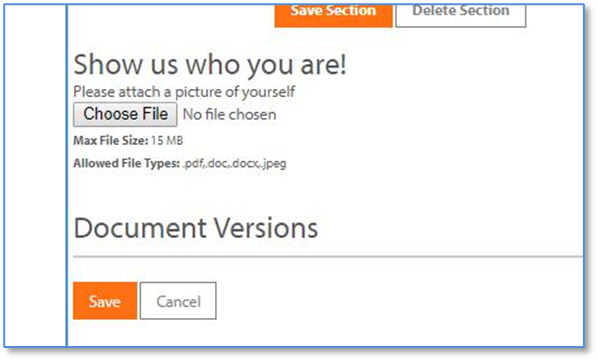
You can also activate the optional Support File Upload fields for any other uploads that should be kept with the submission. This must be enabled if you wish to allow multiple files to be uploaded as part of the submission, such as multiple photos for an awards nomination.
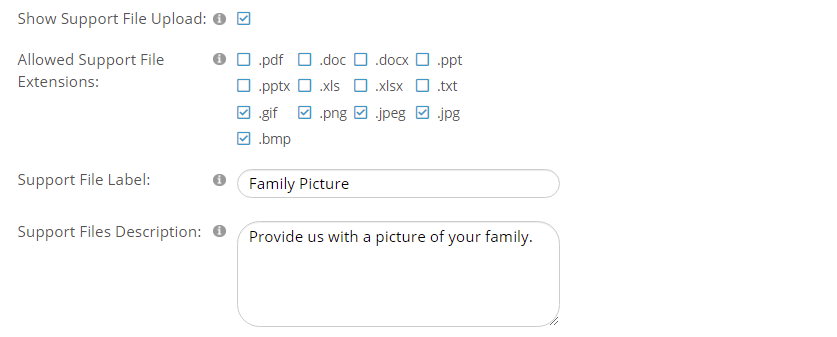
These fields operate in the same manner as those described above for File Upload. You only need to use Support File Upload if a second upload is needed from the user, which in our data is called a Support File.
In both of the upload areas you have the option of determining what type of label you want to use with the upload, as well as any description that will instruct the user as to what document(s) is/are necessary. In addition, you will be able to restrict what types of file extensions can be accepted in the upload. If you don’t wish to restrict the upload types, do not check any of the Override Allowed File/Support File Extension boxes.
The next two fields allow you to provide a Document Data Label that will appear as a heading on the web version of the entire form so that the user understands what you are asking them to provide in their submission. You can optionally use the Document Data Description Field to provide additional information or instructions about the upload requirement or any other aspects of the application. A sample of these text fields in use is in the next screen shot.

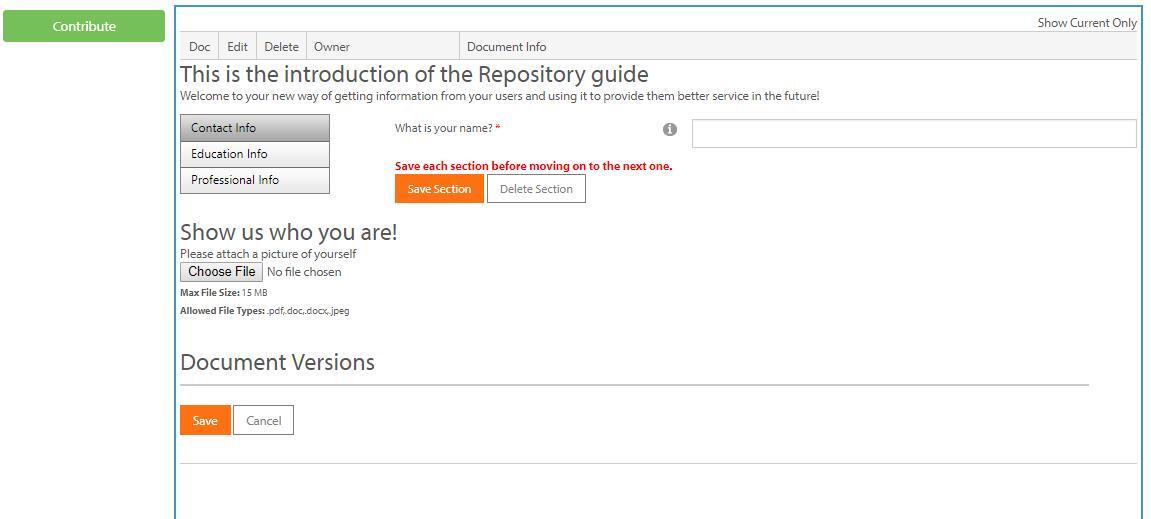
The finished product of a submission form that includes the use of the Document Data Label and Description, with groups of meta data questions displayed as multiple tabs and a File Upload section will look similar to the next screen shot. This is displayed using the website Repository module which executes the submission form you created with all of the settings you established.
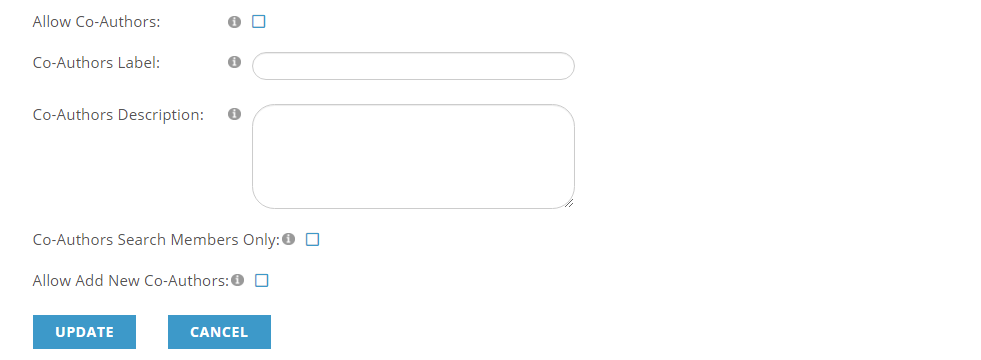
The optional fields at the bottom of the Document Categories section activate different settings to handle Co-Authors, if you are using the Repository for authored documents such as manuscripts or articles and not as a submission form.
When you have finished adding or editing a Document Category, click on the Update button to save your work. To discard any additions or changes, click on the Cancel button. Note that once you save the first category created when adding a new submission document, the document itself has not been saved on that click. There is a separate Update button at the bottom of the form, below Document Categories that applies to the full submission document.