
Event Date Codes can be customized to correspond with the timing of different event sessions within a parent meeting. Once an event has been created, an Event Date Code can optionally be assigned via the Dates tab, as seen in the next screen shot of the Date Code drop down menu for an event that is the child of our sample annual meeting. 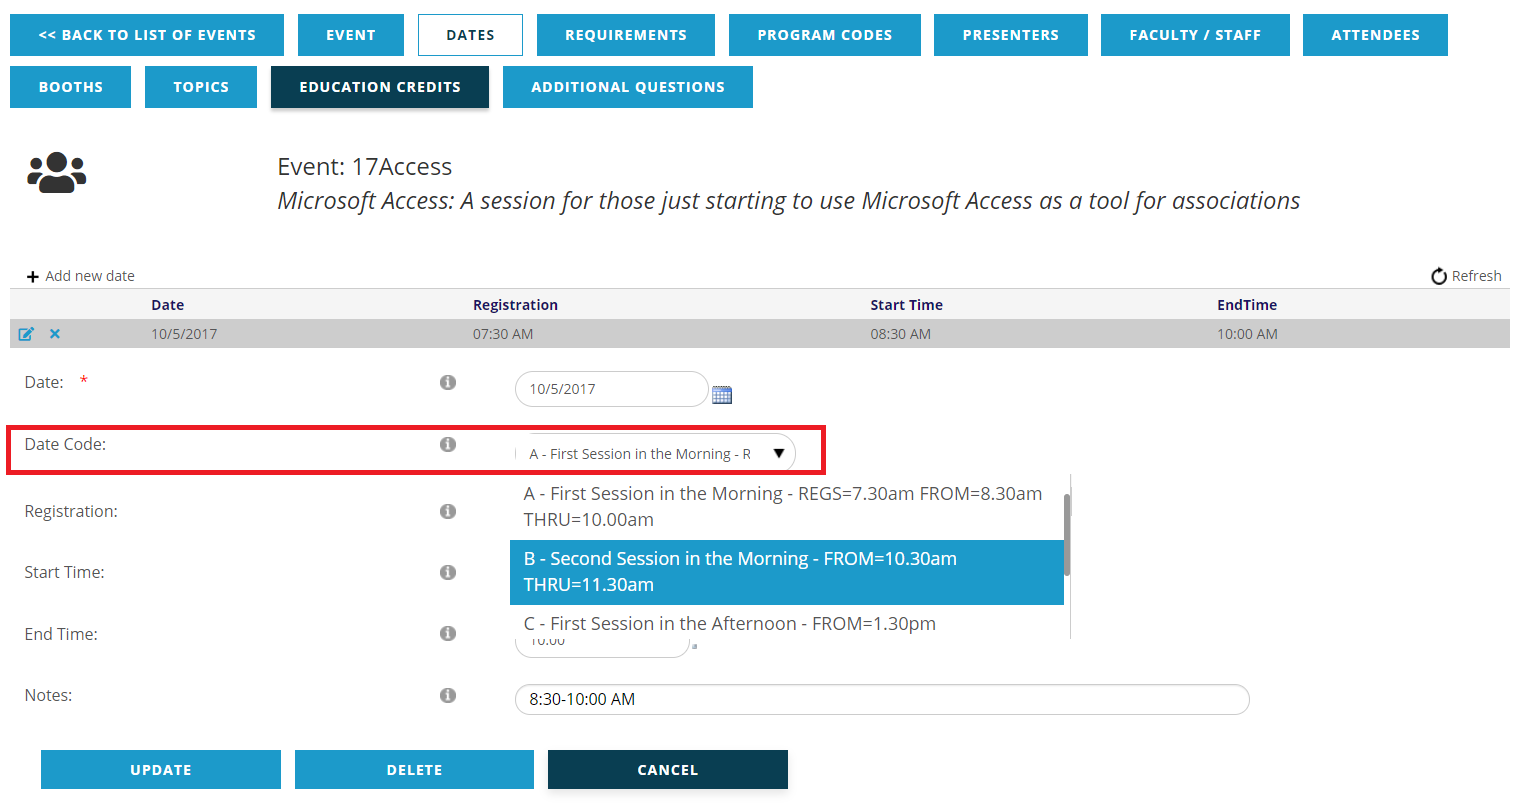
When Date Code A is selected in the example above, the next three fields are filled automatically with the corresponding listed times, as seen in the next screen shot.
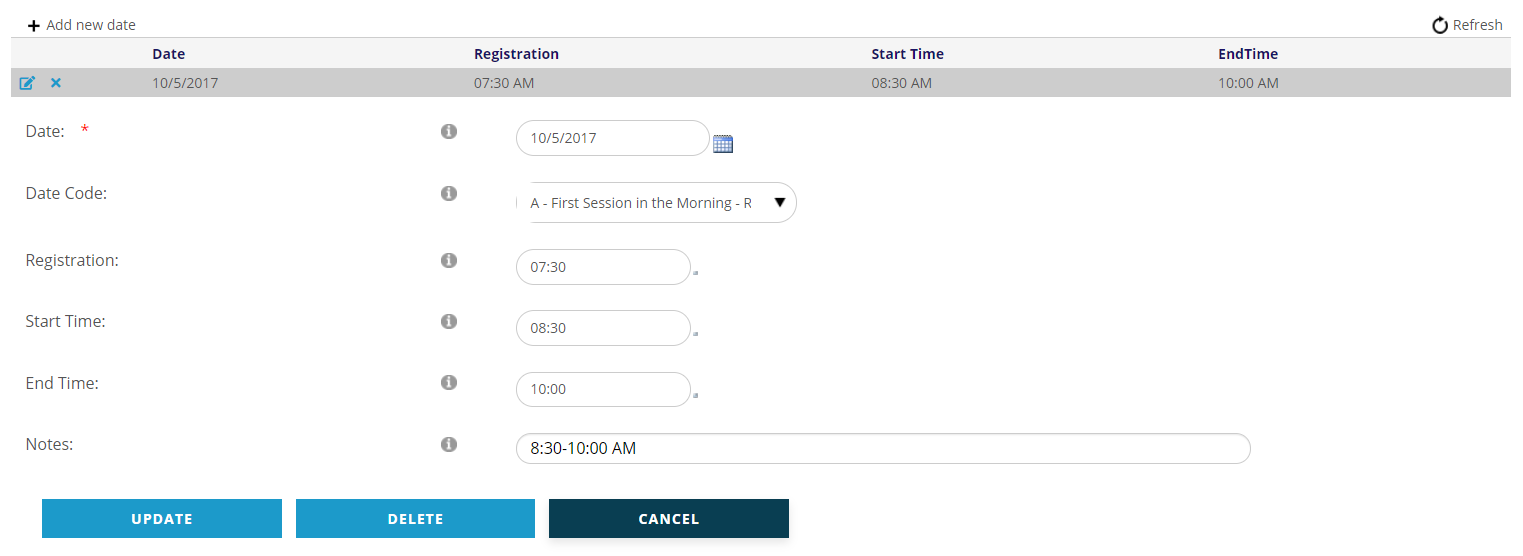
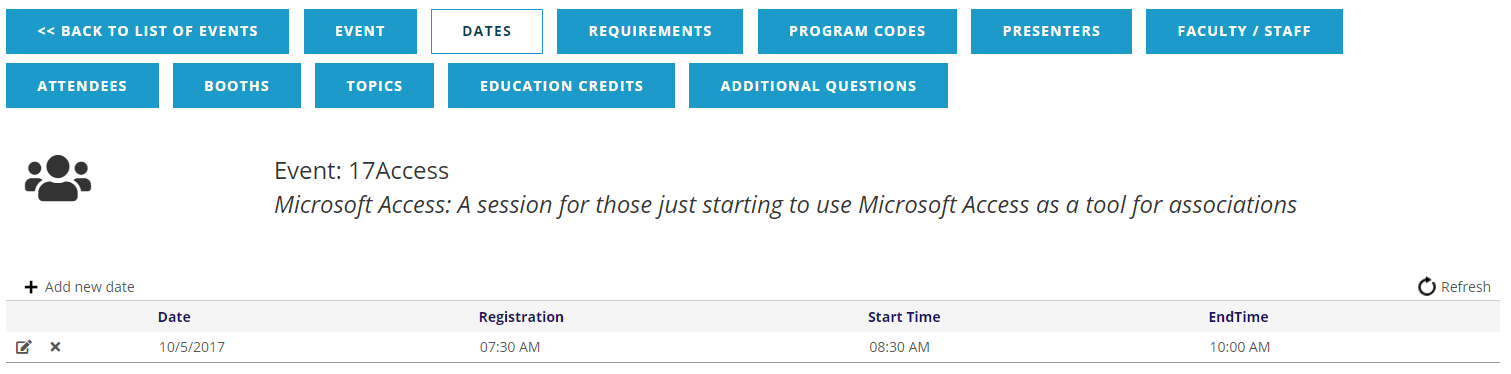
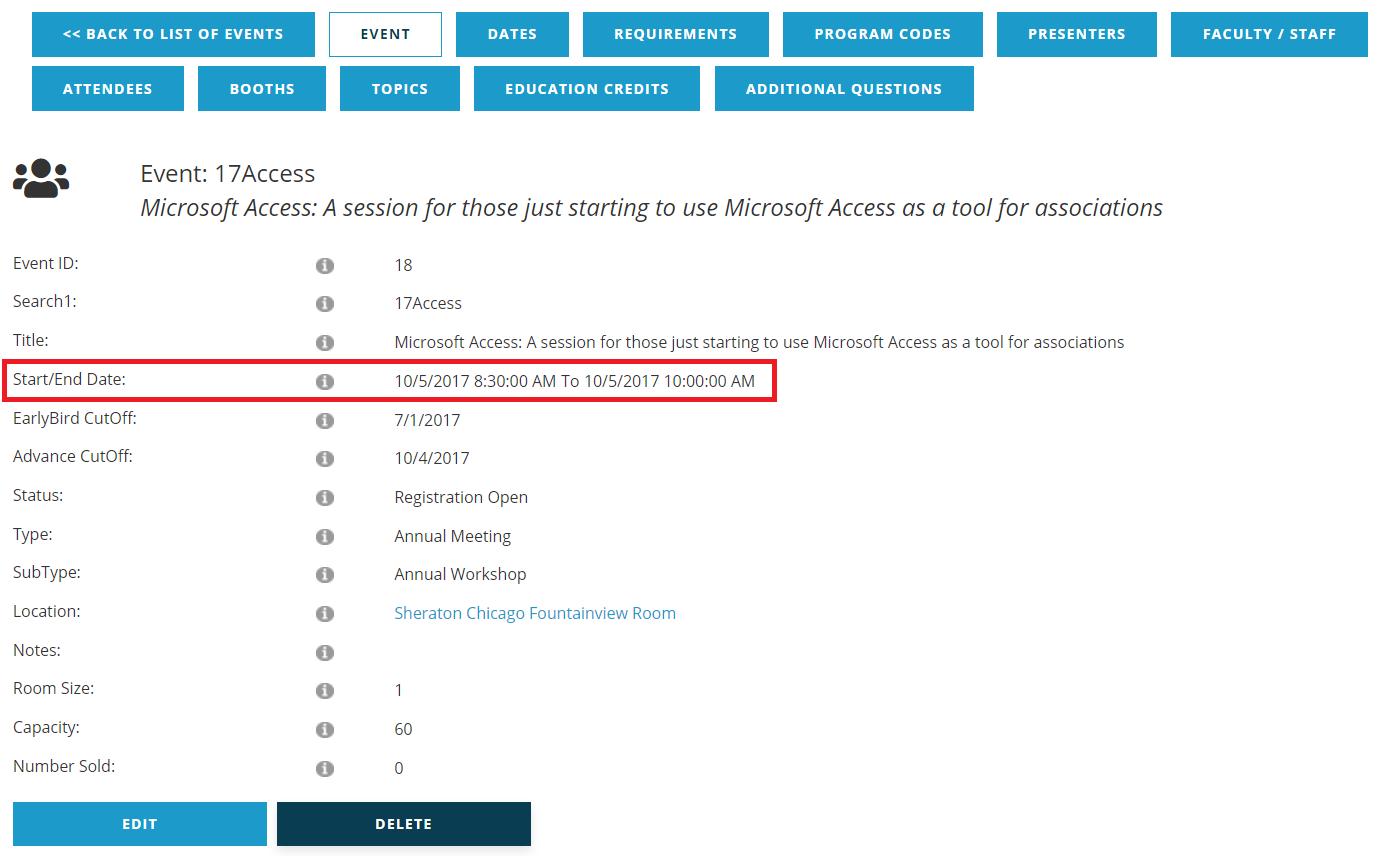
The times are defined via specific Dictionary Instructions that will be covered later in this section. Once selected, this data flows to both the Date Code landing page grid and the Events tab, as seen in the next two screen shots.
The Event Date Codes Dictionary is a flat table where these customized Date Codes are defined. The MasterCodes for GroupType “EVDATECODE” that drive the sample Date Codes seen above are in the next screen shot.
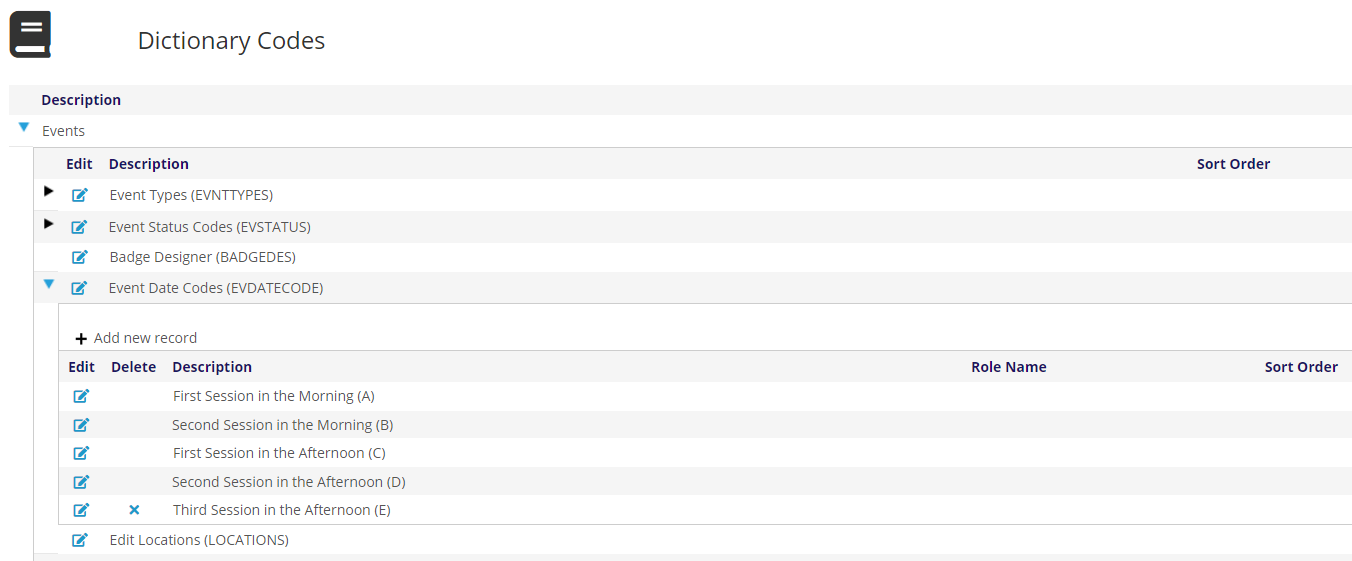
There are optional Instructions at the MasterCode level that define the specific start and end times that appear in the Date Code drop down menu, as seen in the first screen shot in this section of the Dates tab in the AMS. These times also appear in the AMS on the Dates Tab landing page grid as well as the Event tab.
For example, MasterCode “A” in the previous screen shot has “First Session in the Morning” in its Description field, and the customized times that correspond to this session are defined in the MasterCode Instruction field, as seen in the next screen shot.
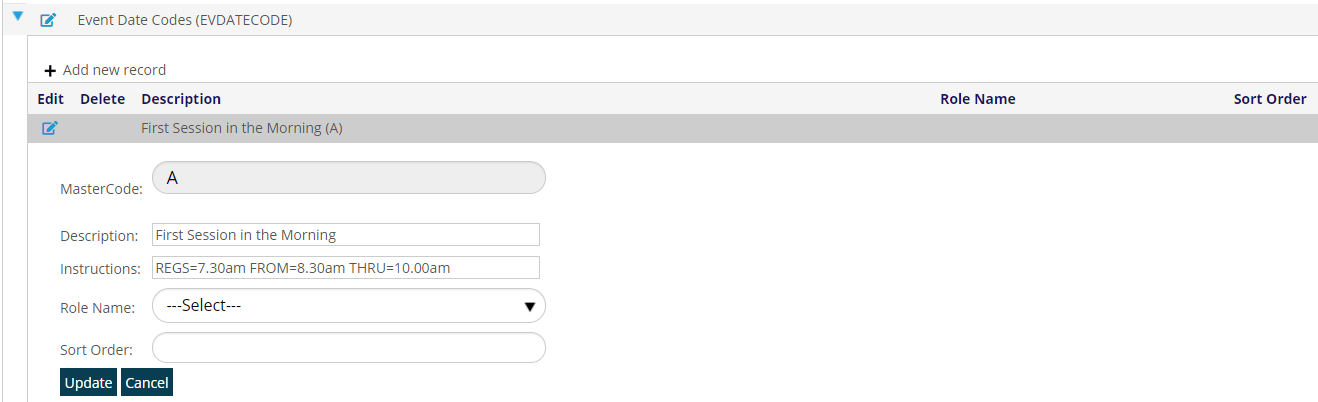
Note that for each Instruction entered, the time includes a period “.” instead of a colon “:” and this is correct usage in this field. When the time is rendered in the AMS, a colon will appear instead of the period everywhere it is displayed except the drop down menu in the Date Codes tab. Use “am” or “pm” immediately after the time with no periods, spaces or capital letters.
“REGS=” when followed by a time populates the “Registration” time field in the Dates tab landing page grid. It should correspond to the time Registration is opened to attendees prior to the event itself. This can be excluded when Registration does not immediately precede an event.
“FROM=” when followed by a time populates the “Start Time” field in the Dates tab landing page grid and the “Start/End Date” field in the Event tab.
“THRU=” when followed by a time populates the “End Time” field in the Dates tab landing page grid and the “Start/End Date” field in the Event tab.
More information on Event Dates is found in the Event Tabs and Functions section of the Meetings section of this knowledge base.