
You can generate Exports with the results of your queries. Exports are one of the more commonly used output products in the Reporter. You can view the results of your query before creating an export.
If you want refreshed results from your query make sure you have clicked the blue Run this Job button. If the number returned seems correct, select Export in the Output Product Selections drop down menu, then click on the blue New Product Setting button.

A new page for Export output will appear.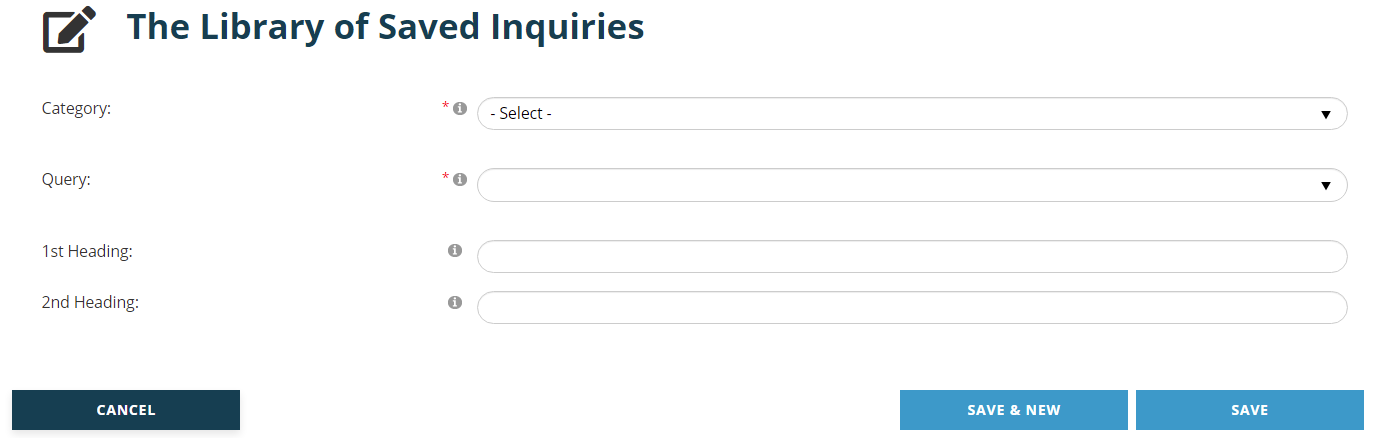
The Category and Query fields are mandatory drop down menus where the category is a parent, and its children are the queries. The choices you make in these fields determine which of the library’s pre-defined data sets you will get back in your output. You have access to options that are standard in the AMS, as well as any that were custom created for your association. Standard options include:
- Company
- Admins Name, Addr, Phones & Member Data
- Key Contact Name, Addr, Phones & Member Data
- Contact
- Name, Address, Communications & Member Data
- Basic Contact Data with Notepad Info
- Contacts who have validated "Terms of Use"
- Contacts without "Terms of Use" validation
- Demographics
- Company data, Member Data, Demographics
- Individual data, Member Data, Demographics
- eMail
- Email List
- Gifts
- Gift Information and mailer
- Members
- Basic Member Information
- Linked Contact Name, KeyAddr, Phone & Member Data
- Member Folder Address, Linked Contact Phone, Email
- Members Including Inherited
- OptInOuts
- Individual data, Member Data, OptInOuts
- USPS
- Mailing List
Type a brief description of your output into the 1st Heading textbox and, if needed, a sub-header in the 2nd Heading textbox. These headers do not appear on your Export, they appear in the output page grid for the Library Card you are using. Since the output you create can be used more than once, it is recommended that you have at least one header that describes the purpose of the output, making it easier to find it in the grid in the future.
Click on the blue Save button to save any changes made. Click on the Cancel button to exit the page and discard any changes made. Click on the blue Save & New button to save the Export output you have been working on and then immediately start creating a new Export output for the same Library Card.
Once you have hit the blue Save button the page will reload in View mode so you can review your work before creating the output. This View page can also be accessed via the output landing page grid when you click on the  blue eye icon found to the far left in the row of the output product you need to review. An example of the resulting View page for a sample export output product is in the next screen shot.
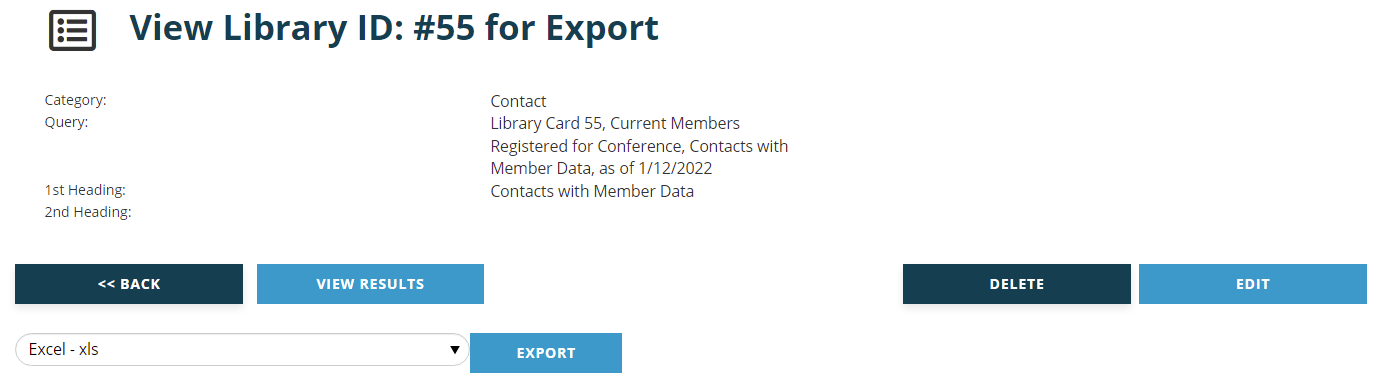
This view includes the Library Card ID number at the top and each of the fields described above followed by the entries for each.
The Back button returns you to the Output landing page grid for this Library Card.
The Edit button switches the page to edit mode for the reports output currently on view.
The Delete button only deletes this particular output product. The Library Card remains intact as is, as well as any other output products listed in the output page grid.
The blue View Results button creates a preview of your export. Once you click this button, another tab opens in your browser that gives you a view of the records pulled when you ran the job. An example of this view is in the next screen shot.

NOTE: When using View Results in QA, you may see an error that the file can't be found. This is usually because the application is trying to use https:// and we are not able to get a security certificate for this internal server. If you receive this error in QA, please try updating the URL to use http:// instead.
This view has more fields than will fit in one screen, so those seen above are the first of many that can be viewed by using the scroll bar at the bottom of the page. The fields available are dependent upon the Category and Query you set for your export. Scroll to the bottom right of the entire page, not just the bottom of the grid, to see a count of all contact records. That number should be the same as the number you got when you ran the job. Next to the number of records, you can see the number of pages in the grid itself. This may or may not be the number of pages generated when you create the Export. Scroll to the bottom left of the grid if it is more than one page to jump to different page numbers or change the number of records displayed per page.
Immediately below each of the column headings are filter boxes. These allow you to further filter the list, but for viewing purposes only. This process does not remove from the export. You may enter a value in the white text box at the top of the column and click on the funnel icon to the right of the box to restrict the list to your value. This approach is useful when you are viewing a lot of records and need to make sure a particular contact was included. For example, you could enter the value Post in the white box below the “Last Name” column header, click on the funnel and select Contains to see if any records with that last name were included. You can also use this approach to make sure certain criteria had the right settings to produce your desired results. Or you might scan the list and realize that important criteria are missing from the Library Card.
In this view you may also group the records by any of the columns. Click on the column header you wish to group by, then drag the header towards the narrow bar at the top of the grid and drop it when black placement arrows appear to the left of the reminder message to “Drag a column header and drop it here to group by that column”. For example, you could group the records by Member Type when that field is available. The groups appear in ascending alphanumeric order. This order can be reversed to descending, and vice versa, by clicking on the arrow to the right of the field name you dragged to the top bar, which is highlighted in this screen grab. 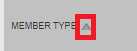 This re-sorting can take some time depending on the number of records and the sort category, so don’t click in any other fields until the grid has reloaded. To reverse the grouping, hover over that same field name box in the top bar, and when you see a pop up box that says “Drag out of the bar to ungroup”, click and drag the field name down to any location in the main grid view and then unclick.
To close out the view of results, close the tab it appears on in your browser. Your tab with the view of the Library Card export output will still be open if you haven’t closed it manually.
When you are ready to create your Export, click on the down arrow found to the far right of the drop down box and select the desired format for your Export from the available choices. Then click the blue Export button.
If you have successfully requested the export, a message will appear below the box with your selection, as seen in the next screen shot.
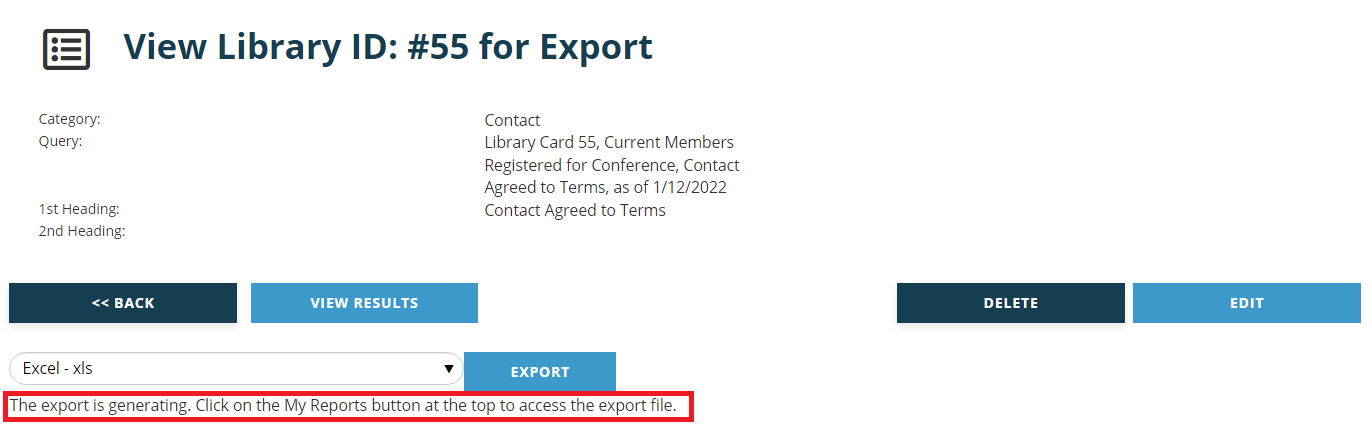
Then click on the “My Reports” button, found at the top right of the page, to the left of your login name. 
The page will reload with a grid of the Reports, Counts, Labels, Lists and Exports that you have run from any Library Card under your login.