
If you need to pull a list of contacts based on shopping cart transactions, add Money Criteria to a Library Card to find them. You can search by transaction data, meeting registrations, exhibit booth purchases, sponsorship payments, ad buys, job posting payments, store purchases, membership payments or any other financial transactions that have taken place via the shopping cart. You can also search for those contacts carrying a balance due for a certain type of transaction, such as a membership or registration.
There are three approaches to creating Money Criteria in the Reporter. Generally only one of these approaches is used per Criteria. You can add more than one Money criteria of the same or different approach to your Library Card. Create your criteria after choosing one of these approaches:
- Program Code
- Meeting
- Format Code
Since the Money Criteria page has many fields, instead of showing you one screen shot of the entire page we will describe most of the fields as they relate to our discussion of and examples for each of the three approaches. For more information on how to operate the controls for these fields, read the Criteria Controls section found earlier in this section.
We will discuss the Description field first, which is relevant to all three approaches.
A Description of the purpose of the criteria must be entered in the first field, which is a mandatory text box. Enter this value before entering any criteria. This description should match the exact criteria you are creating. For example, if your Library Card is targeting contacts not yet registered to your annual meeting, called 18AM in our examples, and you want to omit people who have already registered, you would create a criteria and name it “Current 18AM Registrants” or something similar. This becomes important later when you are applying the And/Or logic to your criteria, where each criteria being named for their exact filter makes it easier to set up the logic to be applied.
Setting Money Criteria by Program Codes
The most common approach to defining Money Criteria is the selection of one or more Program Codes, also known as HotKeys. The AMS lets you drill down as deep into the Program Codes as needed, to zone in on exactly which contacts you need. This method allows the server to find the contact records faster.
This approach allows you to pull contacts that have, for example, active corporate memberships or the selection of the relevant Program Codes for a meeting to get a list of contacts who registered with an Early Bird discount. In the latter case, this approach is more accurate and efficient than using the Meeting drop down menu in combination with other fields to find Early Birds.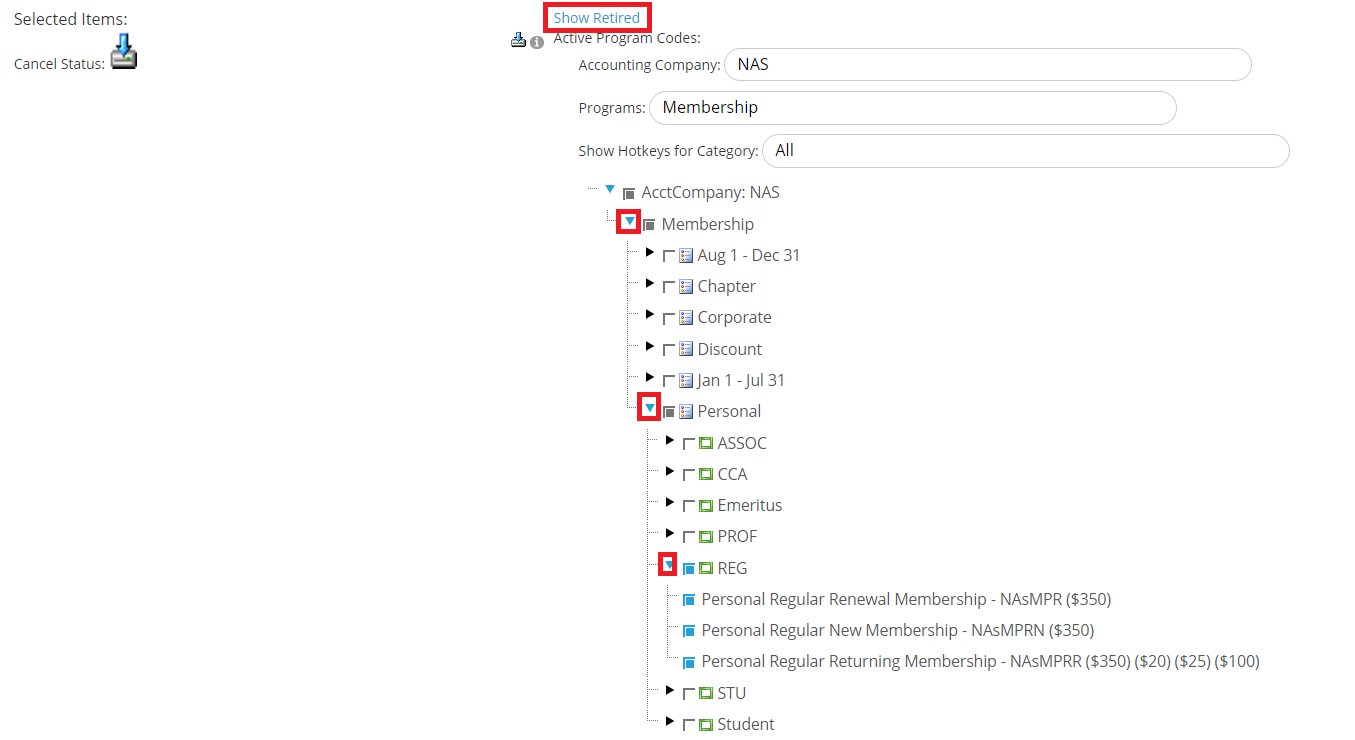
Show Retired, found just under the Description field, is an optional toggle for Program Codes only. Retired Program Codes are hidden by default, but to set criteria for a retired item, click the Show Retired link and you will have access to Retired Program Codes.
Under Active Program Codes, select the Accounting Company and Programs that you want to look at in this Money Criteria. NOTE: The criteria is limited to one set of Programs and if you want to include Programs from other parts of your tree, you will need to create multiple Money Criteria. Once you've selected the Accounting Company and Programs, the AMS will expand the list of program codes, allowing you to drill down to the exact code(s) you wish to select via check box to be included in your criteria.
Note that if you select more than one Program Code on the same criterion, when you run the job the Reporter will treat all of them with an “OR” operator within that criterion. In that case, running the job will return contact records with any one of the Program Codes you selected.
If you need to find contacts that have a combination of particular program codes, you must add each one to your Library Card on separate criteria and connect them with an “AND” after clicking on the Go to And/Or’s button.
If, for example you need to send a blast email promoting your 2018 Annual Meeting’s Early Bird discounts to everyone who registered in time to get the Early Bird discount for your 2017 meeting, the selections seen here should all be on the same criterion. You will get anyone who paid one OR the other of the Early Bird options, and that will give you the most records that meet your criteria. You would get zero contact records if you put these on separate criteria and joined them with an “AND” operator.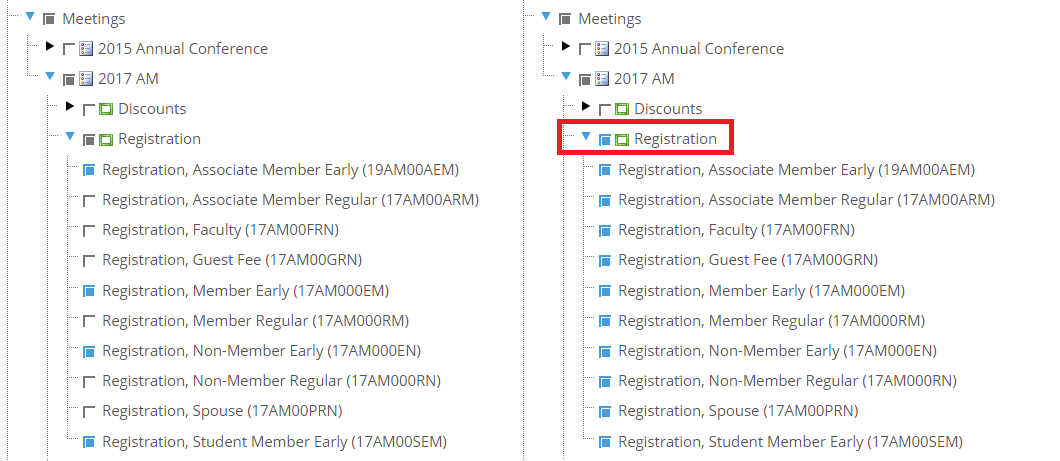
If instead you need to send a promotional email to everyone who registered for your 2017 Annual Meeting at any price, click in the parent “Registration” check box and the AMS will automatically check the boxes for all of the children under that code to include them on the same criterion. When you run the job, the Reporter will search by these Program Codes with an “OR” operator, and that logic works in this case since you want to find everyone who has one and not all of these Registration Program Codes.
If you wanted to send the promotional email to those who registered at any price to both your 2016 AND 2017 Annual Meetings, you would need to create two separate money criteria on your Library Card, one with the 2017 codes selected as in the previous example, and another with the equivalent 2016 Registration Program Codes selected. After joining these criteria with an “AND” operator, run the job and the system will pull records for anyone who registered for BOTH meetings at any price, excluding those who registered for one but not the other. If you add all of those Registration codes to the same criterion, the system will instead return records for those who have any single code among all those selected. That group would include people who attended one but not both of those meetings.
Note that when you further qualify Program Code criteria with fields in other areas of Money Criteria outside the Program Code tree, such as date or dollar amount fields, the system automatically uses “AND” operators to join those selections. These additional fields are described below.
Setting Money Criteria by Meeting
To determine which contacts registered for a Meeting, Event or combination of Events within the same meeting, there is a simple way to set search criteria via the Meeting and Event fields.
Note that you can only pick one meeting per criteria, but you can add separate criteria for another meeting on the same Library Card as needed. If you want to capture all the contact records with any transaction on that meeting, you don’t need to select any events for your Money criteria. But you do have the option to select one or more events from the chosen meeting by holding down the CTRL key while clicking on Events.
In this example above, the criteria will not pull records for everyone who came to the 17AM Annual Meeting, but instead pull contact records only for those who came to the "17Bench" and "17Access" sessions of that meeting.
Setting Money Criteria by Format Code
You can set Money Criteria to search by Format Code, and in combination with some other fields as needed. You can search by Format Code to find anyone who has donated within a certain dollar range and/or date range in order to send them an appeal to give more during the next fundraising cycle. Find any contact who has ever posted a job listing or bought a particular item from your store to send promotional emails to generate more sales of either. Search for those who have purchased a membership since a certain date, including returns. These are just a few examples of how to search based on transactions that take place via Format Codes, which define particular “buckets” of money in your accounting system. Note that you can’t select a Meeting or Event or a Promo Code in the same criteria that searches by Format Codes.
The Format Code field is a drop down menu. Once selected, any corresponding appeal codes will load into the Appeal Code drop down menu where they can be selected or not based on your search goals.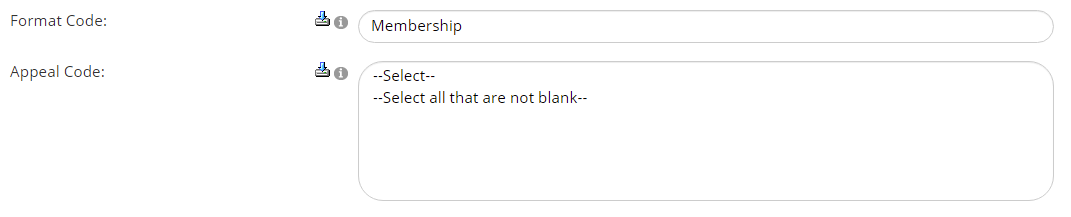
If, for example, you want to find contacts who have purchased a membership since the first of the year, select “Membership” for the Format Code, and enter the correct date in the first Entry Date field, leaving the second field blank.
Fields Used As Needed For All Three Approaches
The rest of the fields on the screen are optional to further filter your criteria.
 The AMS will automatically factor out records with cancellations and only include active registrations. You do not need to use the Cancel Status field to factor them out, as long as the stoplight icon shows the green light. If you wish to instead select those that have cancelled transactions, then click on the stoplight icon to toggle it to red.
There are four different sets of fields that use date ranges, and they should only be used on criteria with transactions that have corresponding date related data. Entry Date will always reference the date a transaction was processed. Due Date fields will only work with transactions that have a due date in the system. Start and Expire Dates should only be queried on money criteria that involve financial transactions for items that have start and expire dates in your system, such as memberships.

The Quantity fields use a drop down menu and numerical text box that can be used to find those who purchased various quantities of the same item. The drop down lets you specify the operator you wish to use, the text box below it lets you enter the qualifying value to be used in the criteria. In the example below, we are looking for a quantity greater than or equal to 5.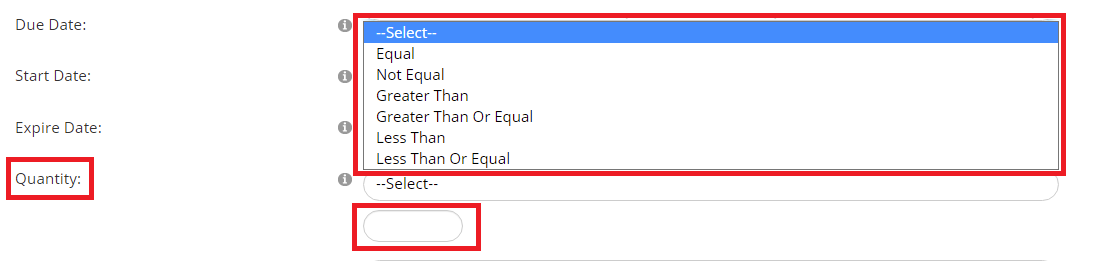
The $$ Total fields are a drop down menu and a numerical text box that let you select an exact, minimum or maximum dollar amount by which to search for the kind of transaction data selected for the same criteria.
The Amount Due fields are a drop down menu and a numerical text box that let you select an exact, minimum or maximum dollar amount due on the kind of transaction selected for the same criteria.
The Amount Range fields are numerical text boxes that allow you to find transaction amounts that fall within your chosen range. The numbers entered in each field are included in the query.
The Promo Code field is a drop down menu where one or more Promotion Codes, also known as Coupon Codes in the Shopping Cart, can be selected to further define Money Criteria to include those contacts that made a purchase using the selected code(s).
The remaining fields are for a variety of purposes, but the Contact field is used far more often than the others.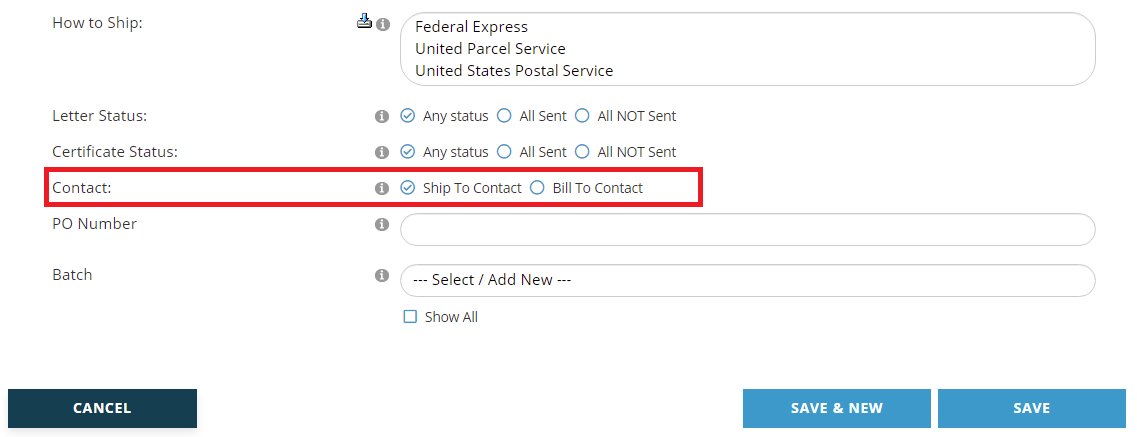
Contact is a radio button field which defaults to the Ship To Contact, who is the recipient of the purchased item whether that contact paid for it or not. For example, for Criteria involving registration, the Ship to Contact would be the attendee, even if someone else processed the payment. If Billing Contact is selected, the contact record for the person who submitted payment for the transaction data on the corresponding criteria would be pulled, regardless of who would attend via the registration. Since some associations have staff who submit payment for multiple conference registrations, this alternate field allows Criteria to look for those cases.
Click on the Save button to save any changes made. Click on the Cancel button to exit the page and discard any changes made. Click on the Save and New button to save the Money Criteria you have been working on and immediately start creating another Money Criteria for the same Library Card.
Clicking the Save button brings up a View page for the new criteria. The same process applies when an existing Money Criteria has been edited. Double check the criteria to make sure the fields were set correctly. If you need to make changes, click on the Edit button below the summary. If everything is correct, click on the Go to And/Or’s button and set your And/Or preferences. That process is described later in this chapter.