
Each contact record’s Name tab in the AMS contains the root information common to all contacts used in the Profile Criteria, such as the contact type, status and name. All contact types are included, such as Individuals and Companies.
Click on the blue “Profile” button from a Library Card to bring up the Contact Profile Search. When you click on the blue “Add New Criteria” button, the page with Profile Criteria fields appears, as seen in this example. 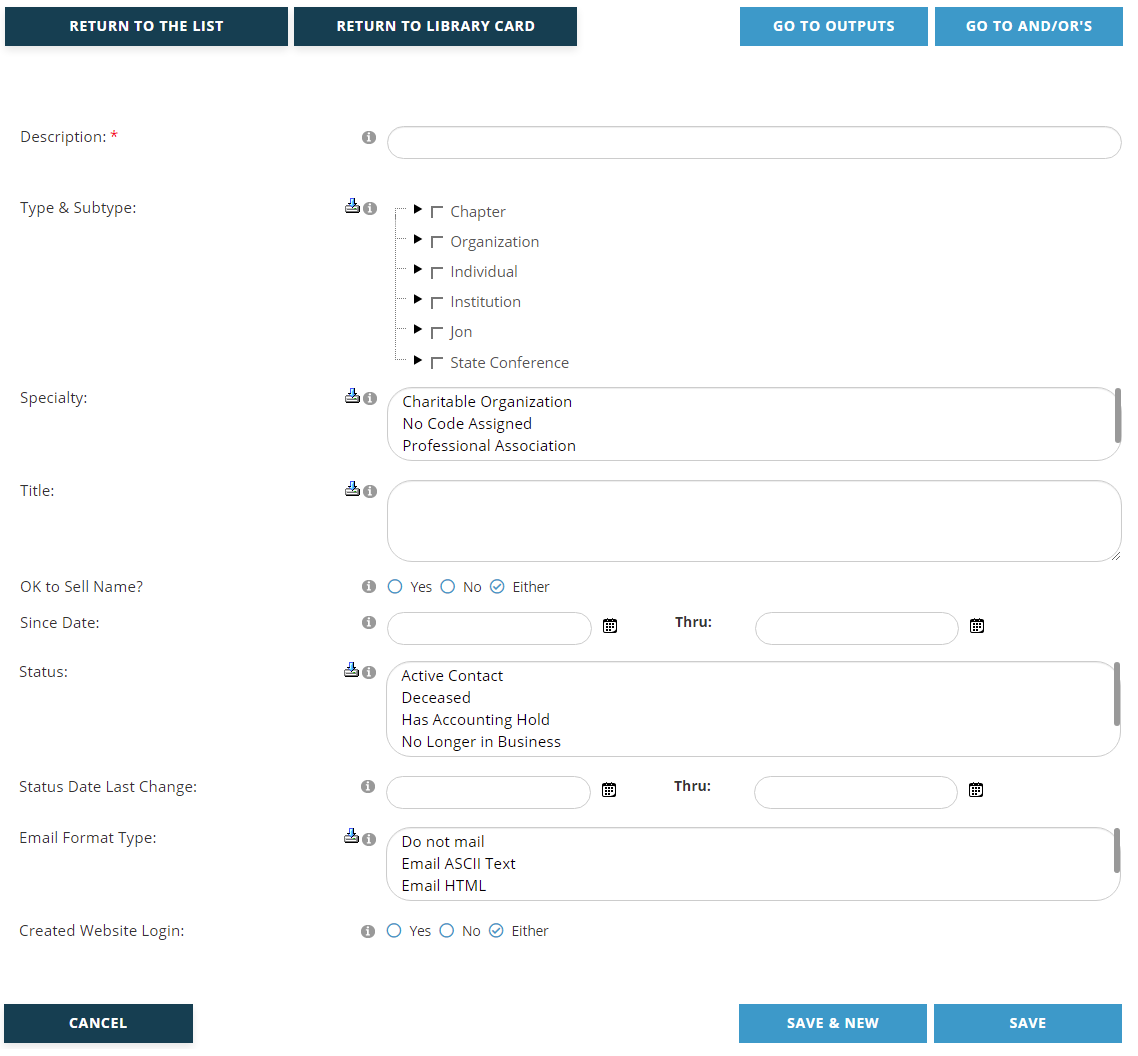
A Description of the purpose of the criteria must be entered in the first field, which is a mandatory text box. Enter this value before entering any criteria. This description should match the exact criteria you are creating. For example, if your Library Card is targeting people not yet registered to your annual meeting and you want to omit people with the status of “Deceased”, you would create a criteria for Deceased to remove them from the group. You would then want to name this criteria something similar to “Deceased Contacts”. This becomes important later when you are applying the And/Or logic to your criteria, where having named criteria for their exact filters makes it easier to set up the logic to be applied.
The Contact Type & SubType fields are available for selection via check box within an expandable tree structure. If any of the Contact Types have a check in their box, the search automatically includes all of its SubTypes.
Search criteria can also be set for particular SubTypes. For example, using the “Organization” Type seen in the screen shot above, the user can click on the gray arrow to the left of the “Organization” check box. The corresponding SubTypes will then appear, each with its own check box, as seen in the next screen shot.
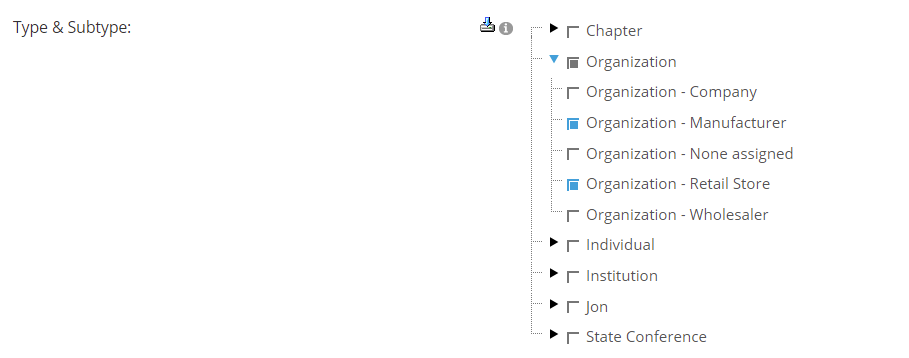 The user then checks the SubTypes to be included in the search criteria. In the example above, the check box next to “Organization” is unchecked in order to allow the search to drill down to the two Organization SubTypes that are checked, for “Manufacturer” and “Retail Store”.
The Specialty field is a multiselect list box that usually applies to Company Contacts that lets you choose from the specialties defined in your AMS that are not already covered by SubTypes.
The Title field is a list box where titles relative to Individual contacts can be typed, such as “Mr.”, “Mrs.” and so on. However, if there are typos in a contact record’s title, like a missing period for example, the record would not meet the criteria and be excluded from the resulting group.
The OK to Sell Name? field is a radio button control that defaults to “Either”. You can alternatively select “Yes” or “No” here as needed.
Note that the Since Date fields correspond to the date a contact record was first created, so if both date fields are left blank, the search will include all contact records ever entered in your system.
The Status field is a multiselect list box where you can select one or more Contact Status Types as defined in your Contacts Dictionary. A common use of this field is the selection of the “To Be Purged” option that could be reviewed ahead of purging records from your system, or to omit them from a blast email.
Please note, no statuses are automatically omitted in the Reporter, including Deceased and To Be Purged. Normally they would not be current members, so if your query is based on dates or entitlements you would not get contacts with one of these statuses in your group. However, we strongly recommend you include a criteria to remove these and all other status types that you do not want to include in an export or email to be certain.
The Status Date Last Change fields are date fields that allow you to search for contact records based on a date or date range during which their Status was changed.
The Email Format Type field is a multiselect list box that lets you select one or more of your available Email Format Types.
Created Website Login is a radio button field that defaults to “Either”. You can alternatively search for contacts that have created a login for your association’s website by selecting “Yes”, or those that have not by selecting “No”.
Click on the blue “Save” button to save any changes made. Click on the blue “Cancel” button to exit the page and discard any changes made. Click on the blue “Save and New” button to save the Profile Criteria you have been working on and immediately start creating another Profile Criteria for the same Library Card.
Clicking on the blue “Save” button brings up a View page for the new criteria. The same process applies when an existing Profile Criteria has been edited. Double check the criteria to make sure the fields were set correctly. If you need to make changes, click on the blue “Edit” button below the summary. If everything is correct, click on the blue “Go to And/Or’s” button and set your And/Or preferences. That process is described later in this chapter.
More information on Profiles is found in the Profiles and Contacts Dictionary sections.