
The Recurring control lets you set up, view and edit future scheduled invoices for a contact. There are options to Edit and Delete an invoice, and the invoice Class, Start Date and Stop Date are also displayed, as seen in the next screen shot.
To Edit or view a recurring invoice, click the  edit icon to its far left, which keeps the full list in view, but drops down information specific to the selected invoice.
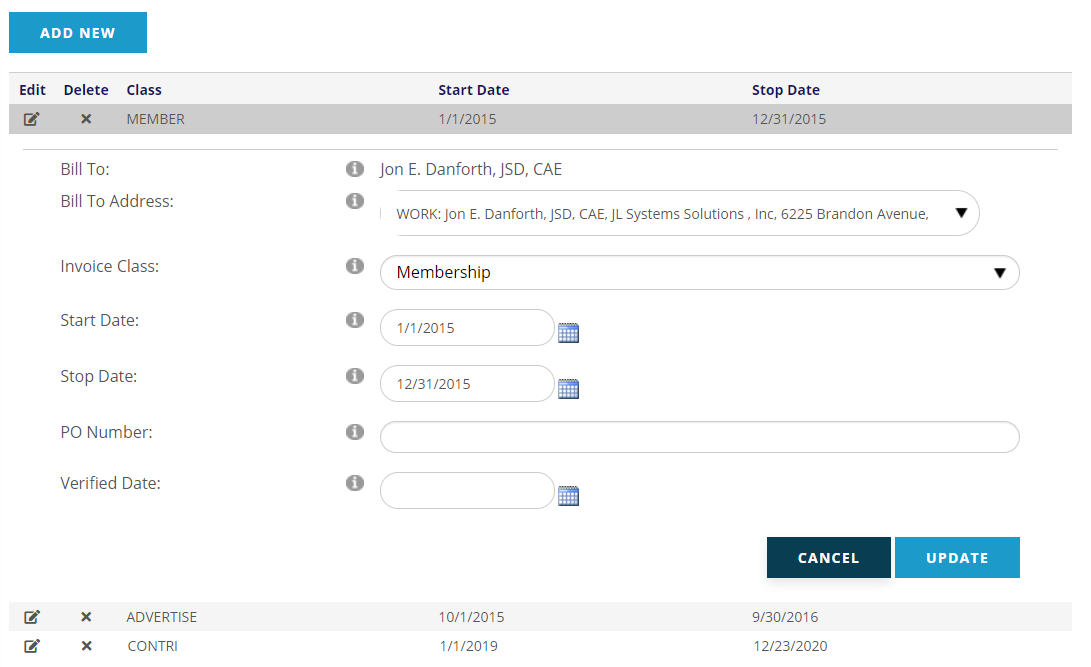
In the above screen shot, you can see the fields that can be edited are the Bill To Address, Invoice Class, Start Date, Stop Date, PO Number and Verified Date. To save any changes, click on the Update button at the bottom.
To create a new recurring invoice under the Recurring control, click on the Add New button found above and the left side of the grid. The following screen will appear.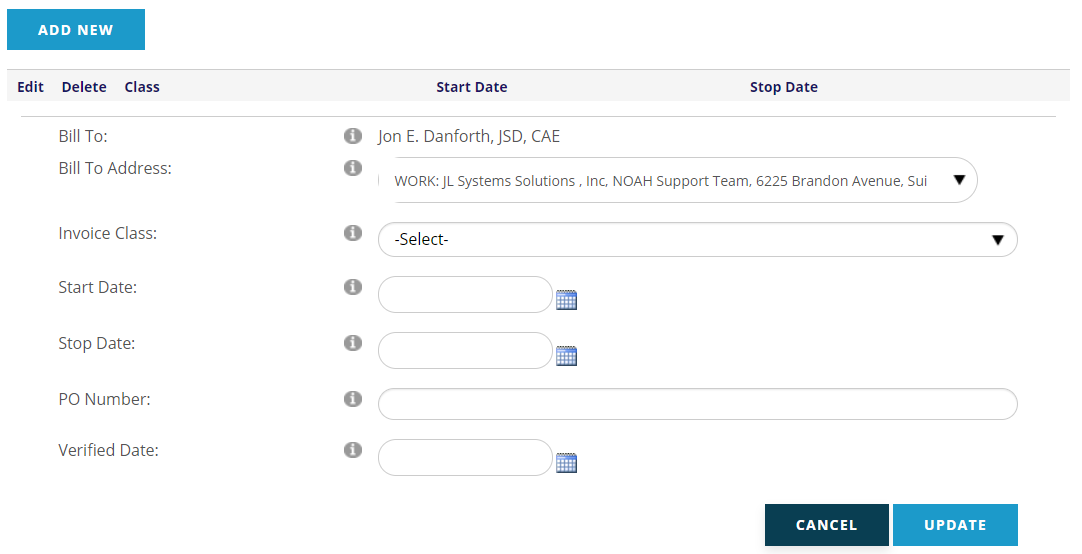
Add information to these fields as applicable. Since this example is for an Individual contact, note that a work address has been selected for billing. For a Company’s recurring invoice, when possible, change the “Bill To Address” to that of an individual that is associated with the company.
Once the proper fields have been populated, click on the Update button at the bottom right to proceed. The grid will reload and the new entry should now appear as well as a temporary message below the grid confirming it was saved successfully.
In the Class column MEMBER, ADVERTISE and CONTRI, short for contribution, are also links. For example, when the MEMBER link is clicked, another control will appear below the full grid, as seen in the next screen shot.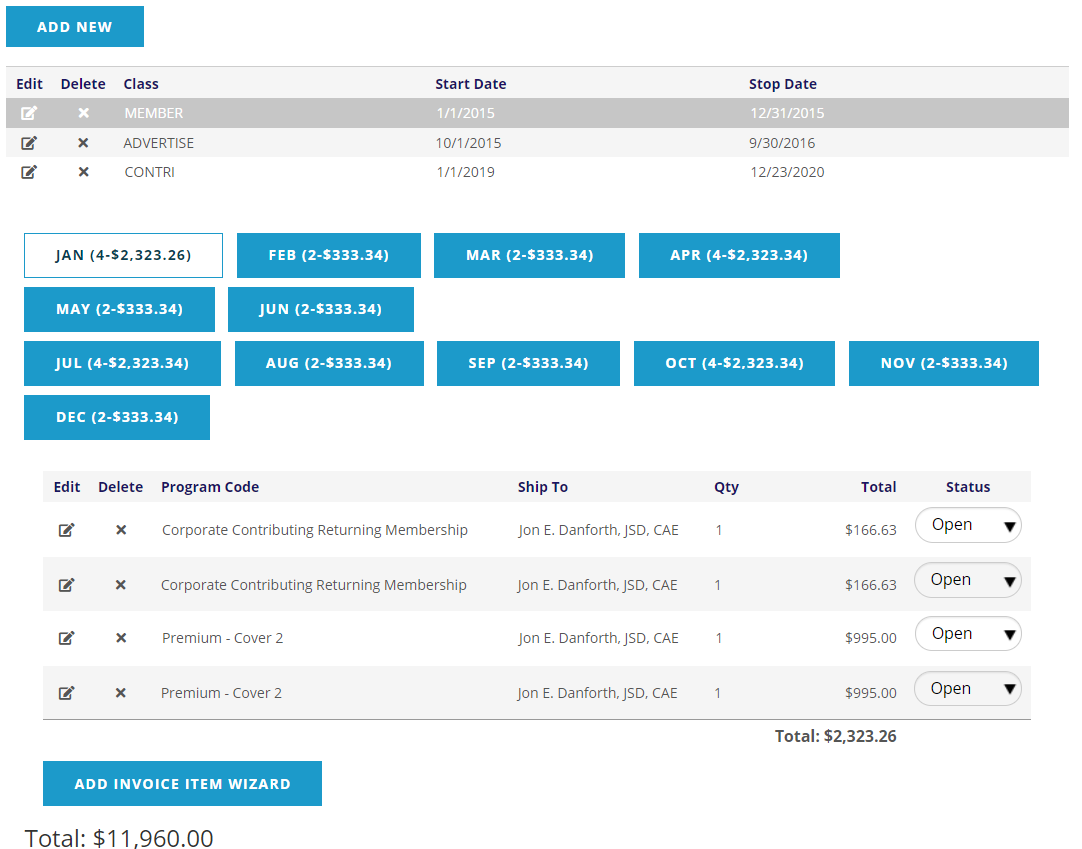
In this case, there are already recurring payments entered on the MEMBER entry. Note that the number of payments and total amount due each month appear on each month button. Click on a month’s button to see the recurring invoices that comprise the total due.
The process to add another invoice is the same as adding the first one. First make sure the highlighter shows up on the recurring invoice that need a recurring payment added to it, then click the Add Invoice Item Wizard button on the bottom left, and you will see the view in the next screen shot.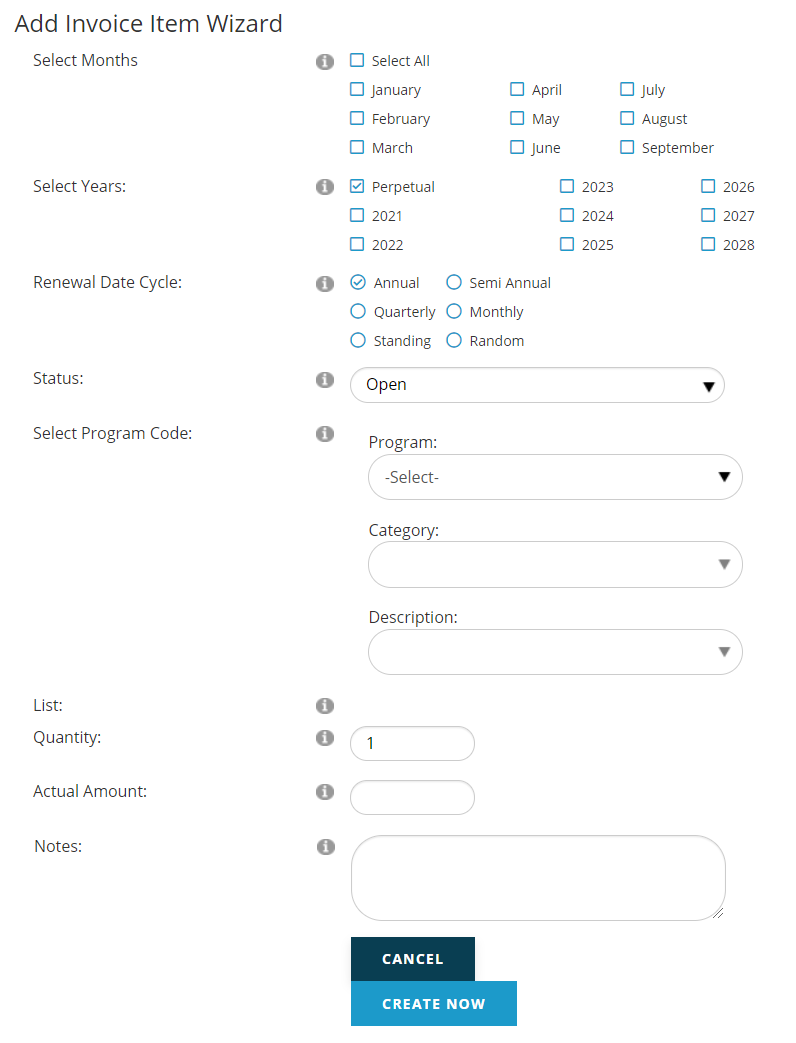
This is where you can use the Select Months and Select Years check box fields to specify the month(s) and year(s) you wish to charge the related fees, as well as how many times to charge a fee. If you wish to create a recurring invoice that continues until you stop it, check the box for Perpetual in the Select Years field. You can then specify the months and frequency of invoices to repeat year after year. Otherwise, pick the specific months and year(s) for which you wish to create invoices.
The Renewal Date Cycle is used to divide the total payment into pieces. For example, if you wish to divide the total cost of an item into four quarterly invoices, choose the quarterly option, and be sure to also use the Select Months field to indicate the four months in which you wish to invoice the item.
Next use the Select Program Code fields to choose the program code you wish to invoice. The list price will be displayed, and you can override this amount in the Actual Amount field if you wish.
Once you have set the months, years and total amount to charge, click the Create Now button to build the entries. You can then repeat this process for as many items as you wish to build in the recurring invoices. The routine you must use to generate the invoices each month, since it does not happen automatically, is in the main AMS menu under Money/Business Office/Build Recurring Invoices, and is described in the Money section of this knowledge base.