
The Show Setup is accessed by selecting Shows from the AMS Menu, then Show Setup. Here you can view a selected range of past, present and future meetings. The screen default setting displays All Meetings, but you can filter down via radio buttons at the top right to see Past 6 Months & Future, Future Meetings, Past meetings, and Un-Dated meetings.
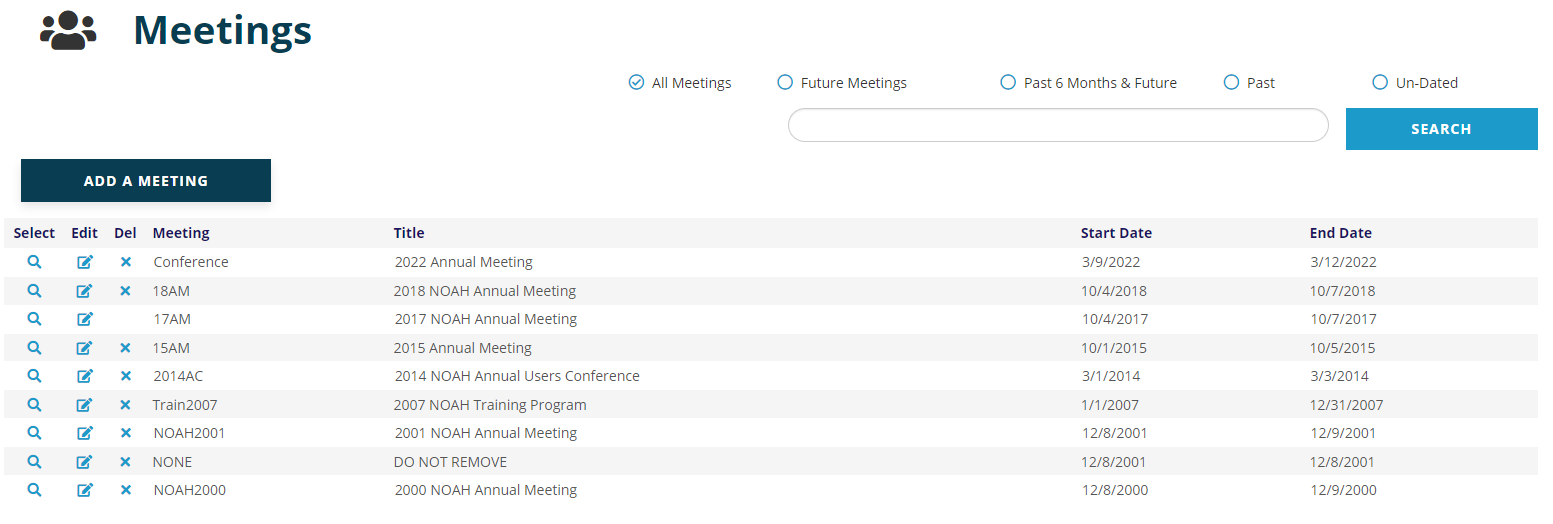
You may select any meeting by clicking on the  magnifying glass in that meeting’s row all the way to the left. When you select a meeting, the meeting details will appear above a list of shows. The next screen shot shows the result of selecting the 18AM meeting.
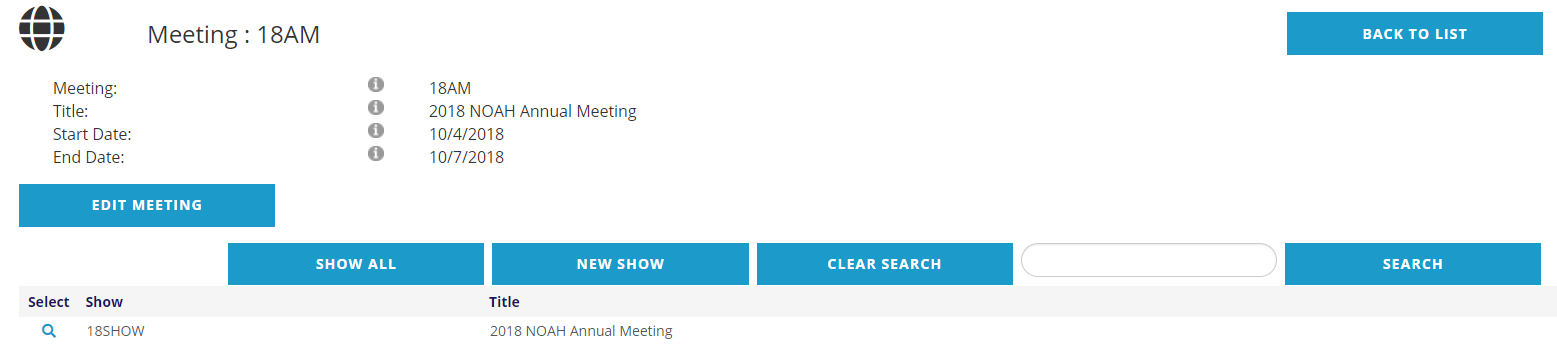
Click the Back to List button to return to the list of meetings.
Click the Edit Meeting button to modify the meeting details.
To begin with, the list of Shows will be empty. Click the New Show button to create a new show.
When you select the New Show option you will be presented with the Show Control page. Five of the eleven buttons are ‘greyed out.’ We will cover the use of the eleven control buttons in the next sections.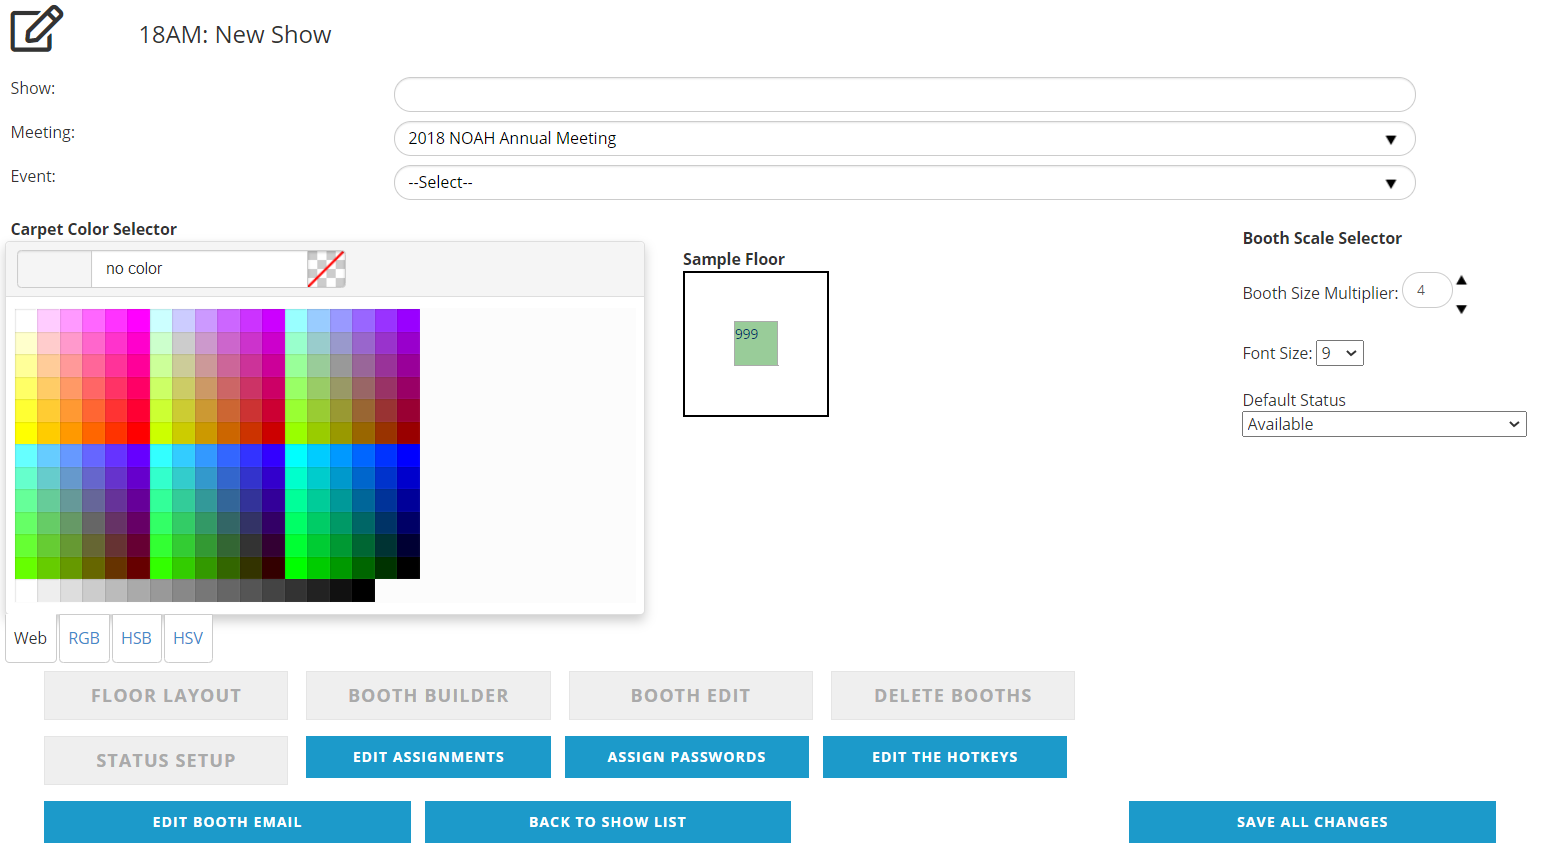
To create a new show you need to give the show a name. In the Show: field you have up to 10 characters to provide a descriptive name for the show (no spaces or special characters). We strongly recommend using a pattern of the first two characters representing the year of the meeting to make copying year over year much easier. The Meeting: field is already populated but you can change to another meeting using the drop down menu. The Event: field will list all events associated with the selected meeting. Select the “expo” event then select the Save All Changes button.
The remainder of the New Show page is divided into four sections; the Carpet Color Selector, the Sample Floor, the Booth Scale Selector and the control buttons. Once the show is saved all of these buttons on the right side will now be active.
The purpose of these tools is to recreate the show floor map, assign colors to different environmental features and the various states of a booth to assist in the process of booth sales and to create a graphical map that can be added to a booth directory.
The Carpet Color Selector is a visual color picker with 232 color options.
The Sample Floor section displays what the default status booth (Available) will look like on the currently selected Show floor carpet (background) color.
The Booth Size Multiplier field is used to control the size of the booths on the show floor. The standard booth unit is 3 meters x 3 meters (approximately 10 feet x 10 feet). Using a single pixel to represent one square meter would make for a very small map and would not allow for a booth number to be displayed within its borders. Using a Booth Size Multiplier of 4 will display a booth as 36px x 36px square.
The Font Size field controls the size of the text (usually the booth number) within a booth.
The Default Status field indicates the type of booth that will be created when you start building booths. This drop down can also be used to preview what each booth type will look like when placed on the selected background. More about this will be explained in the Status Setup section below.