
Status Setup is where you define which booth statuses and environmental features you want to identify on your Show Floor in addition to the colors you want to use for each.
When you select the Status Setup button you will see the Exhibit Booth Status Colors popup window.
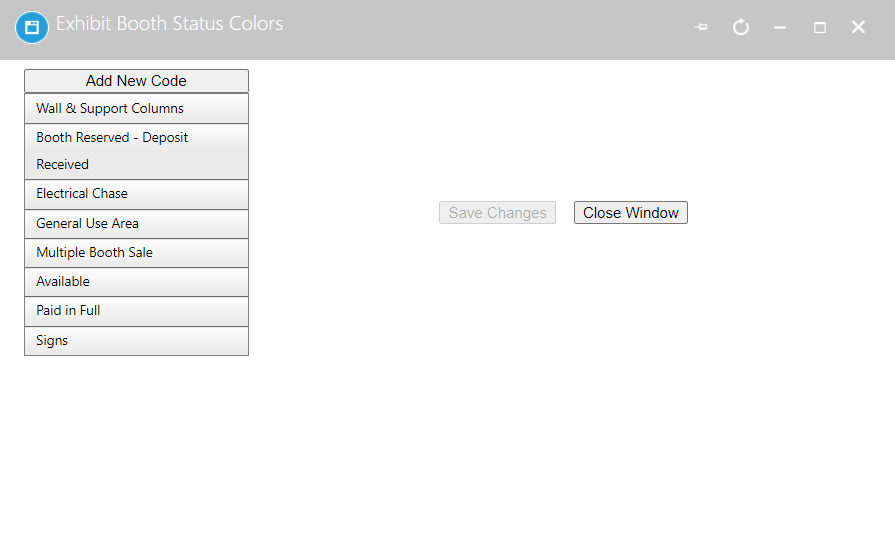
You will notice that there are already eight defined statuses. Use the Add New Code button at to left to create a new status.
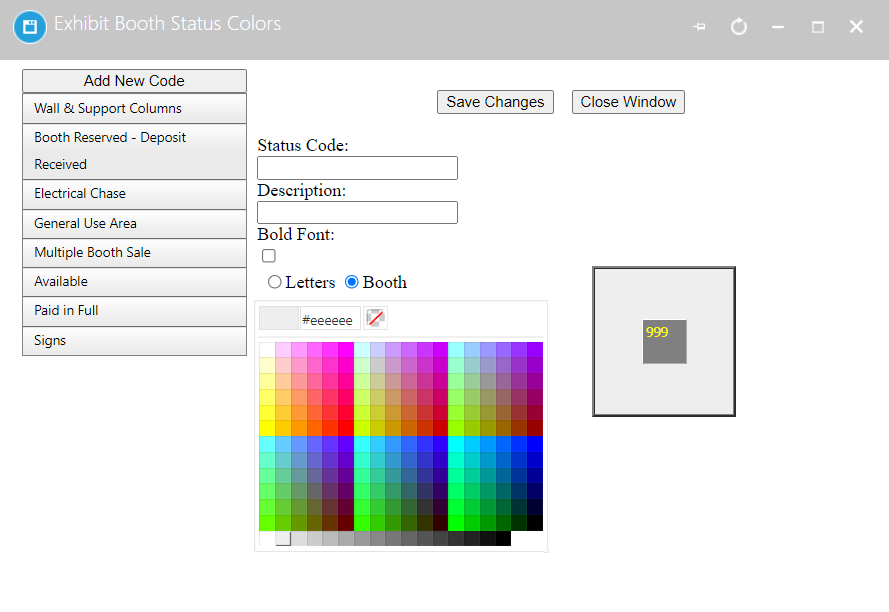
The Status Code is limited to 8 characters and will appear in the Booth editor next to assigned booth numbers. The Description should clearly identify the purpose of the area and will appear in the legend.
Check the Bold Font check box if the booth number should be bold for this status.
Using the color picker, identify the “Booth” color, then click on the “Letters” radio button and select the color for the text. The Sample Floor box will display the results of your selections against the currently selected background color.
Click the Save Changes button to commit your changes. When you are finished, click on the Close Window button or click on the Close in the top right area of the popup window to close the popup.
This control can also be used to modify the current settings for each status.
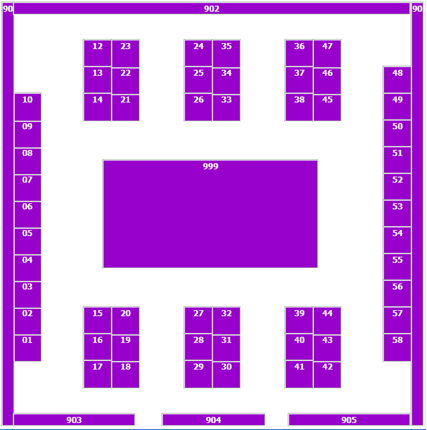 In our example, before making any changes the show floor will have purple as the color for the outer walls of the floor. We can change the color to black by changing it within the status for Wall & Support Columns.
First click on the Walls & Support Columns status in the list of code descriptions on the left, as seen in the previous screen shot. This popup will appear for editing Walls & Support Columns:
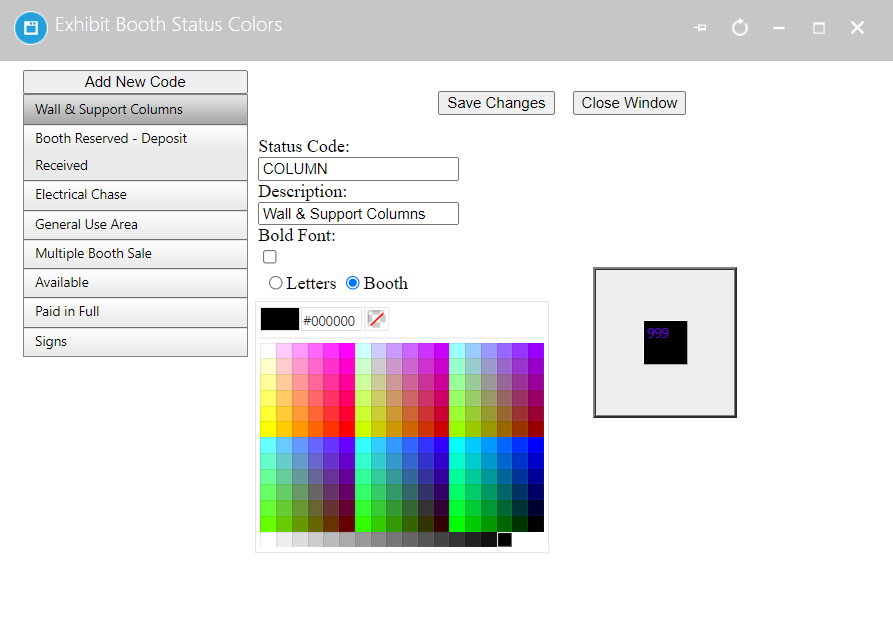
To change the booth color from purple to black, we first make sure the Booth radio button is selected. Then we use the color picker to select the desired black color. The popup will reload with the new black color and we can see how it looks with the current color selection for “Letters” in the Sample Floor box. We can do the same with the General Use Area in the center where we will serve food.
After we determine the color we want for the Letters, we click on the Save Changes button to commit our choices.
The show floor now looks like this:
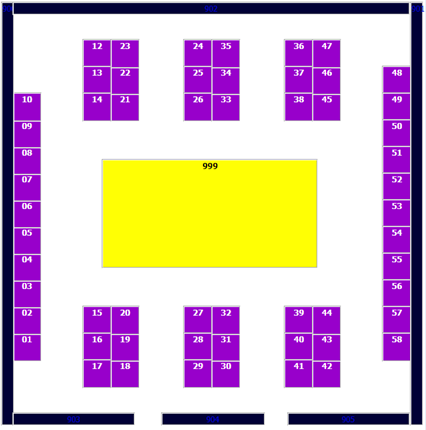
You will notice that the booth numbers appear in the top center location of each booth.
There is no valid reason to display the 999 booth number for the “Food” General Use Area. There is a Text: field in the Exhibit Booth Editor where you can override the booth number with text.
First, we click on the Booth Edit button. Then we select “999 GENERAL” from the booth list on the first popup screen, since that is where the food area will be.
This popup will then appear for editing that booth:
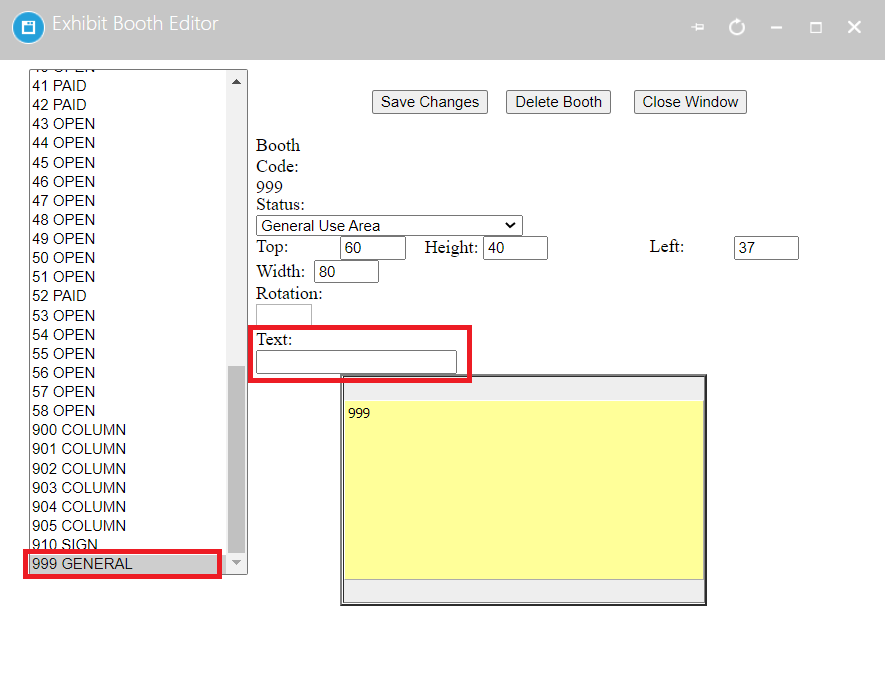
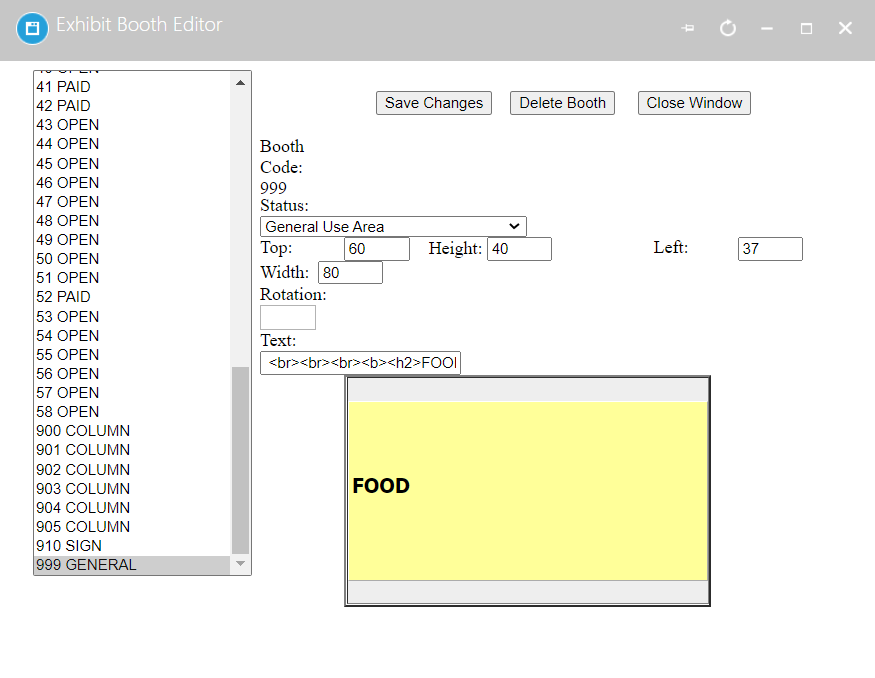
If we add “FOOD” to the Text: field for this booth and click on the Save Changes button, the popup will reload. We can use HTML code to make it look even better. For example, we can replace “FOOD” in the same text field, and use this html code instead:
FOOD
Once we click on the Save Changes button, the booth editor popup will reload.
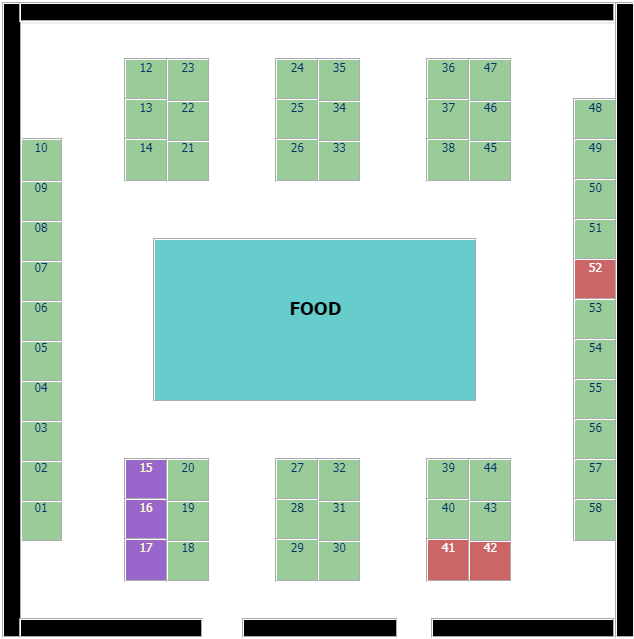
After changing the available booth color to green and changing the food area’s color in the Status Setup, the entire floor now looks like this, with some booths having been reserved and shown in purple and red.
The Exhibit Booth Status Colors control can also be accessed via the Shows Dictionary, which is accessed by selecting Dictionary from the Shows drop down menu. Expand Setup by clicking on the right arrow, and click on the  edit icon next to Booth Status to open the control page.
Although the color selection seems to be limited, you can still make a show floor that works with your branding.