
The Shopping Cart control is used to manually create an invoice. This is used in all cases when you wish to create an invoice for a contact, with or without a corresponding payment. The process begins with a listing of the Shopping Cart program codes in tree view.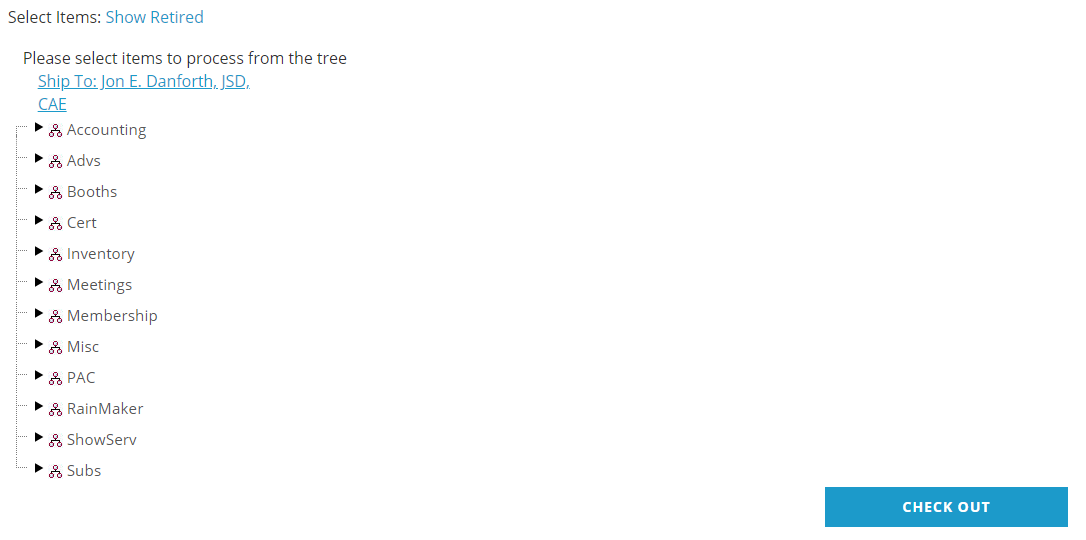
Click on the  arrow for any category to expand the list of items within the category that can be placed on an invoice. Once the items are sufficiently expanded, click on the item for which you need to see the list of available purchases, which in the next screen shot is what is available under “General” Donations.
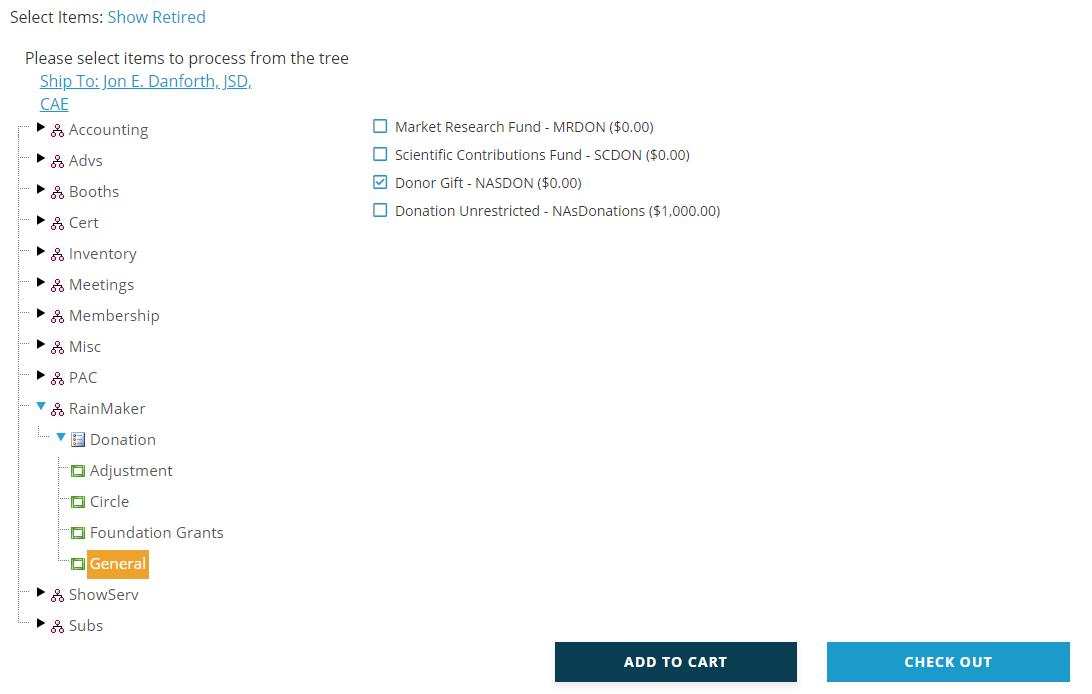
Click on the check box to select an item in the list on the right. This is a multi-select check box function, so you can select as many as are to be purchased at the same time before proceeding. But remember, if you need to change a selection, make sure you uncheck any item you chose in error before proceeding.
Once selected, click on the Add to Cart button to add the item(s) to the cart. A message should appear above the tree confirming “Your items have been added.” Once all of the items you wish to add are in the cart, click on the Check Out button which appears next to the Add to Cart button once items are in the cart. You will then be presented with a summary screen to view the items in the shopping cart.
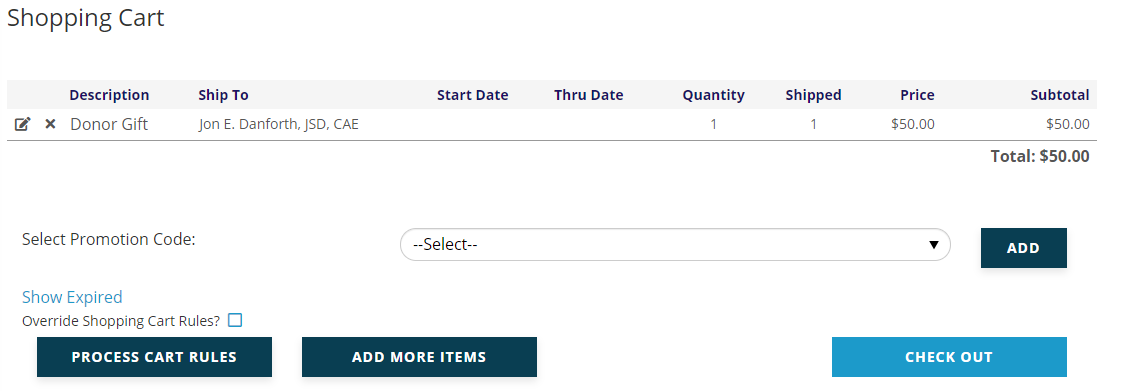
Items in the cart are listed at the top and will remain there until you process the invoice or delete them from the cart. You can override the pricing, start and expiration dates, and any other aspect of the item by clicking on the edit icon. If you need to add another item to the cart, click on the Add More Items button. Once you have the items in the cart exactly as you wish, click on the Check Out button to proceed, even if there is no payment being made at this time. The payment screen will load, as seen in the next screen shot.
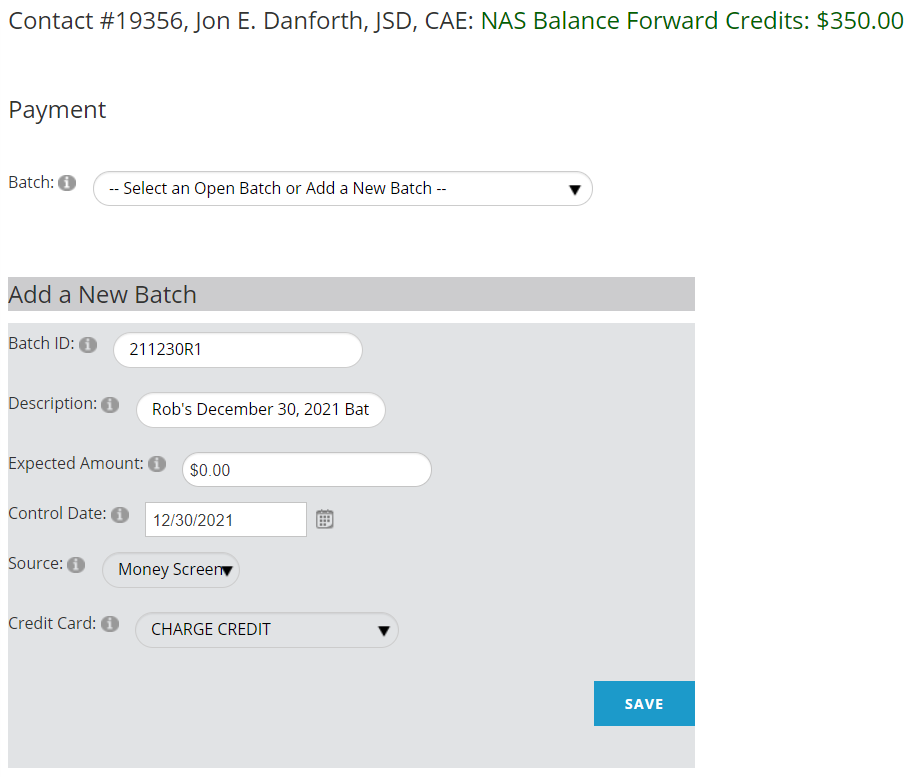
If you have already created a batch for the current day, it will automatically be selected for the Batch ID field. If you have not created one, or you wish to use/create a different batch than is selected, choose the appropriate option from the Batch drop down field at the top of the form. If you are creating a new batch, it will default to today’s date with the first initial of your username in the Batch ID. You can override anything you wish before creating the batch control record.
The Credit Card field should be set to CHARGE CREDIT if you want the card to be charged automatically be processed through your payment gateway. Only if the cards being processed have been previously charged outside of the AMS and you want to enter reference credit card information without actually charging the credit card, would you change the Credit Card drop down field from CHARGE CREDIT to DO NOT CHARGE CREDIT CARD.
Once you have selected a batch, click the Save button to proceed to the payment screen, shown in the next screen shot.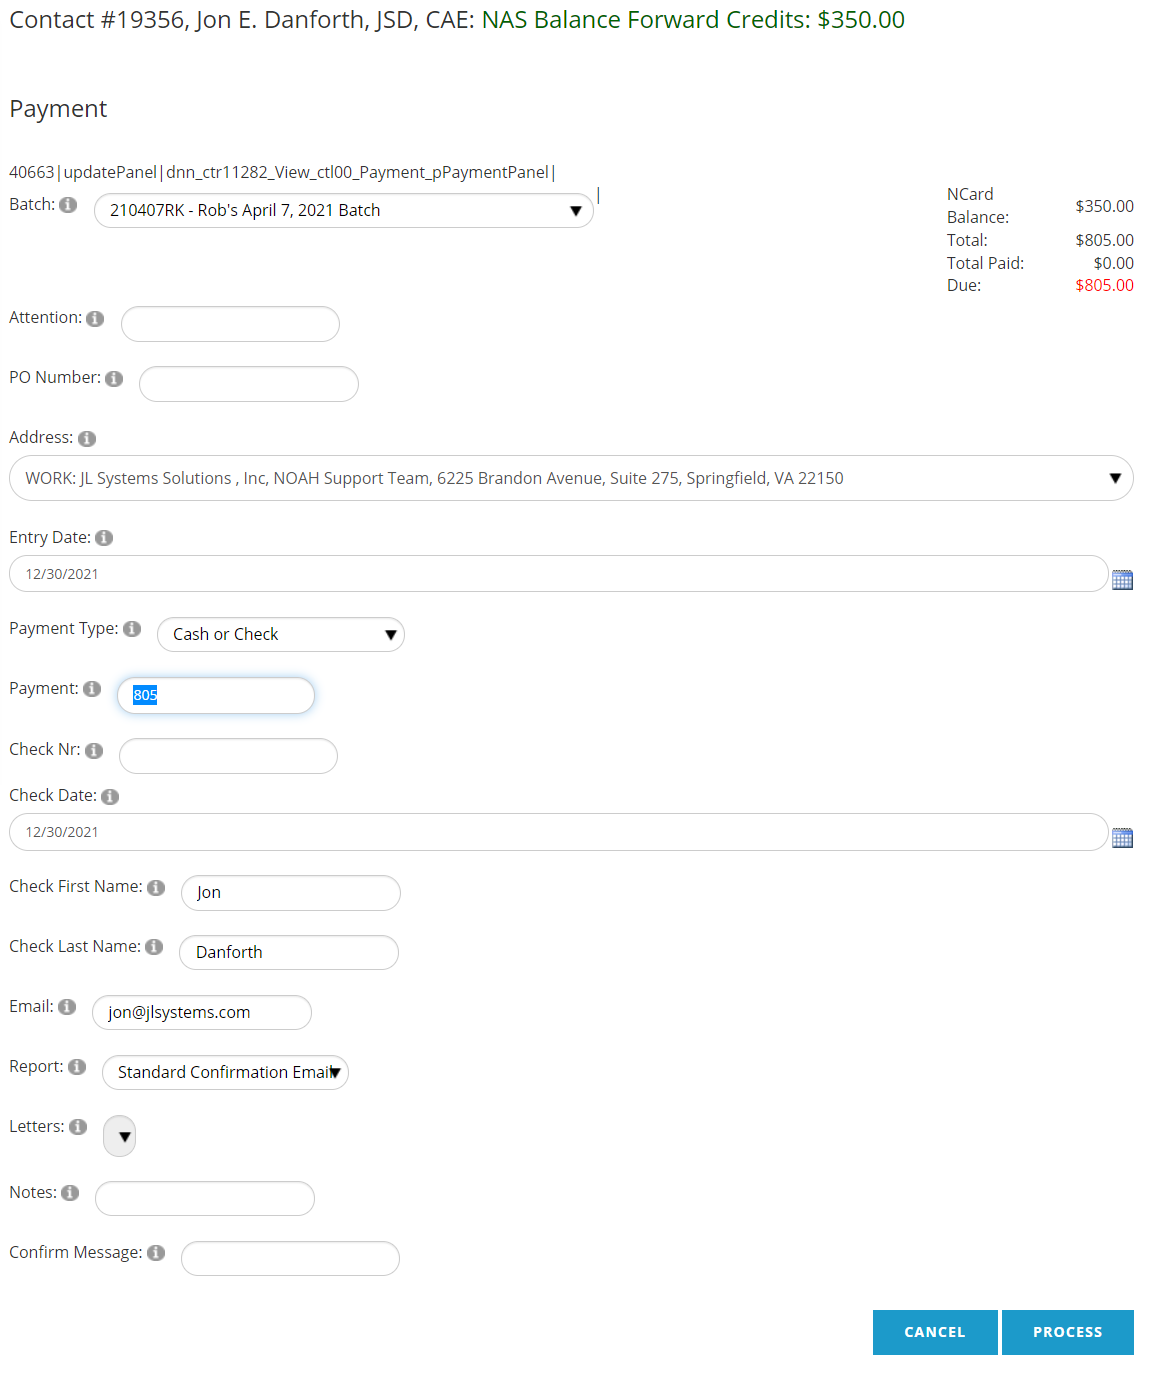
If you wish to create the invoice without a payment, be sure to enter $0 for the Payment amount. Otherwise, enter the amount being paid up to the amount of the invoice. Select the Payment Type, and enter the required information for the payment method chosen.
If you wish to send a payment confirmation email and there is no email already populating the Email field, enter the intended recipient’s email address. The key Email for the Bill To contact automatically populates this field if one is designated. If you do not wish to send a confirmation email, blank out the Email address. Erasing it in that field does not update the contact’s email address record, it only prevents the sending of a confirmation email for this particular payment. These messages are recorded on the contact's Profile under History, Email History. If the email is erased the message will still show in the contact's Email History with a blank email address. If you want to send the confirmation email to multiple addresses, separate them with a semi-colon.
NOTE: If the email on the payment screen is missing (either the contact doesn't have one, or a staff person removes it on the payment screen) no Bill To or Ship To Program Code emails will be sent; this is to allow no emails to be sent if invoices are being created after the fact and you don't want these messages to be sent. If the Bill To does not have an email, but you still want the Ship To then you must enter an email (it could even be yours) on the payment screen.
The content of the payment confirmation email is an html compatible template that your staff create and control. It can be personalized by a Client Admin to include tokens from the database which typically include the purchaser's name, billing and shipping addresses, a thank you message, links to your website, your organization's address and logo, and any other content you wish to include. You can also specify in Program Codes whether an email is sent immediately or only when an item is paid in full.
Additionally, you can create secondary, personalized emails that are triggered by the individual items on the invoice or in the shopping cart. For example, if a person is joining as a new member and registering for an event, you can create a separate email that is tied to each item. That way you can thank the person for joining and welcome them to your association with a reminder of benefits and links to member's only content, while also sending an email with specifics about the event they registered for, along with links to additional content describing the event. This is especially helpful if one person within an organization registers more than one person for an event at the same time, as the targeted email based on that event registration would be sent to each attendee that gets registered.
Credit Card Error Messages
When processing credit cards, the card may be declined for a variety of reasons. When this happens, the message returned by your payment gateway will be displayed in red on they payment screen.
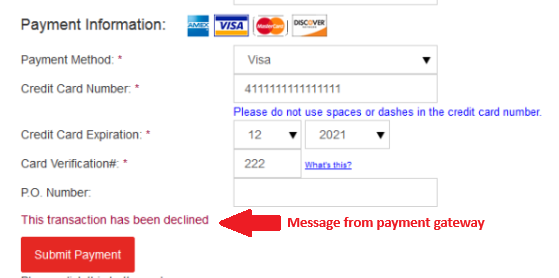
This message is not from the AMS, but from your payment gateway, so will need to contact them for resolution. Generally this is an error with the credentials set in the AMS under System Settings, or an issue with the credit card used.
If you use Authorize.net, their error messages can be see here- https://responsecrmv3.zendesk.com/hc/en-us/articles/360047227074-Authorize-net-Error-Code-Responses
If you use Clover Connect, their error messages can be seen here- https://docs.clover.com/docs/appendix