
The Profile control is a combination of the Name, Address and Phones/Emails controls, thus it is common to have turned off those individual controls in favor of the Profile control. Note that each contact can have an unlimited number of addresses, phone numbers and email addresses. These Profile controls appear together on the same page in the AMS, but since it is a longer page the fields used will be revealed across separate screen shots in this section.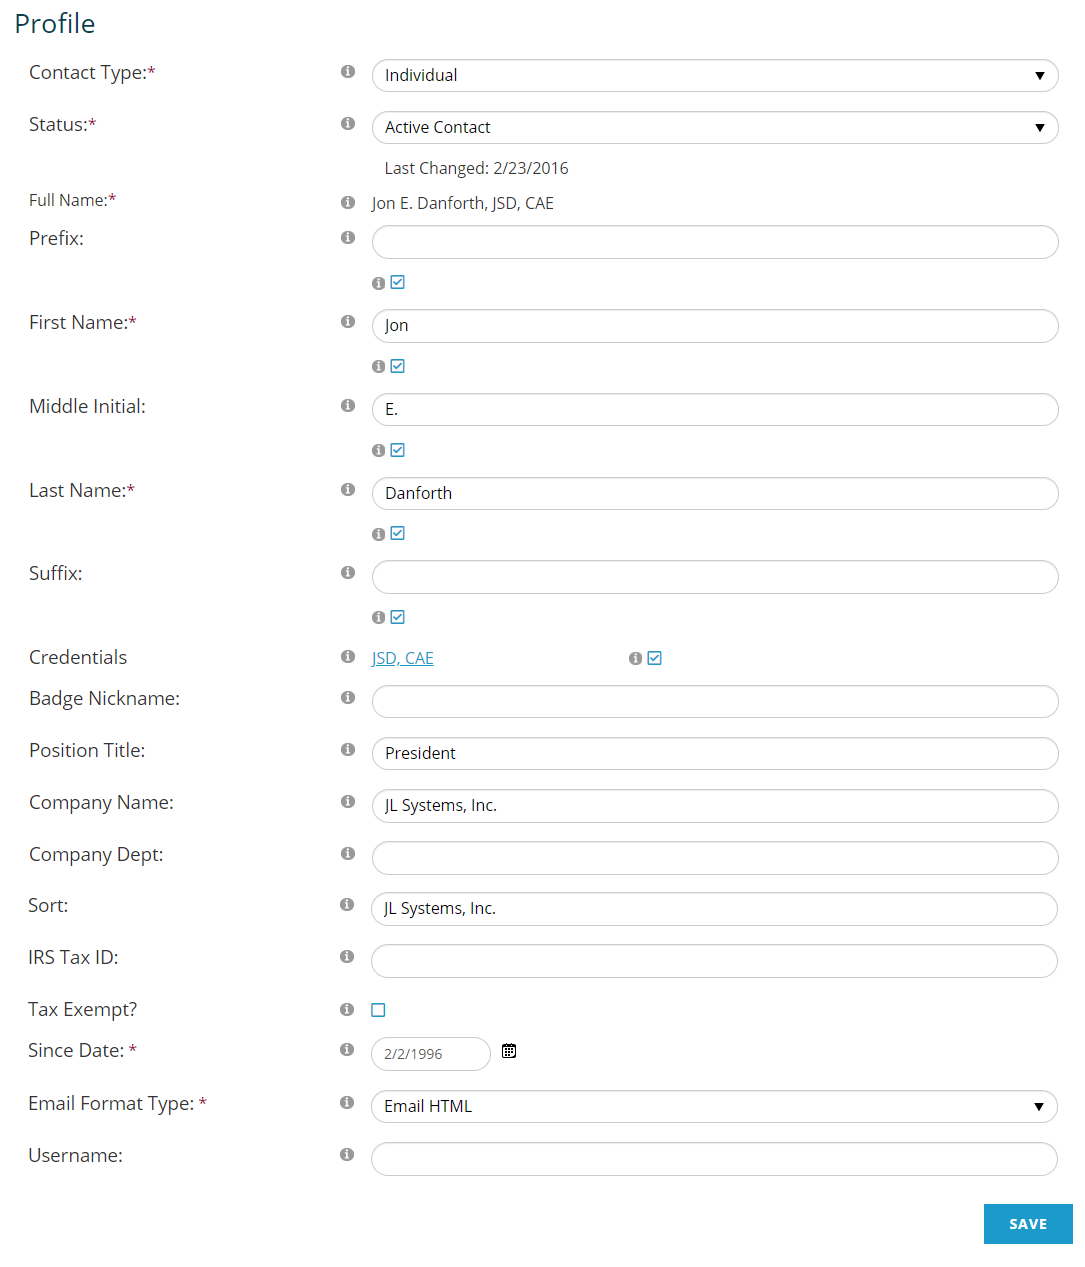
The first section allows you to specify the Name of the contact along with other elements, such as their company name and user account information. If the selected contact record is for a company or organization, then the individual name information will not be displayed.
Contact Type will appear with a default selection, such as Organization, but has a drop down menu populated with standard and, where applicable, customized types. Make sure the correct contact type is selected before proceeding, as the form fields are not the same for each type.
Sub Type allows further definition of an Organization contact that also belongs in a category such as Universities, Hospitals, Companies, or Vendors.
The Status field is for administrative aspects of a contact record other than membership, benefits and entitlements. For example, Active Contact, To Be Purged, Accounting Hold, and Deceased are standard options for an Individual contact record’s status, and customized options can be added as needed to the Contact Status dictionary by a Client Admin.
If there are no administrative issues with the contact, which is usually the case when adding a contact for the first time, the default setting, “Active Contact,” can be selected. Note that standard reports will not include records with the status of “Deceased” and “To Be Purged.”
The Last Changed date is programmed to automatically update anytime the contact’s status is changed. (It does not update for any other changes in the Profile.) This feature was added so you could see this date at a glance without having to access the Log File. See the section later in this chapter regarding the Log File where you can view all changes to the record.
Note that there are check boxes below the Title, First Name, Middle Initial, Last Name, and Suffix fields. The use of these fields determines the data assigned to the Full Name field above all of them. Check the boxes under the fields to be included in the member’s Full Name, and leave the box unchecked to leave a field out of Full Name. NOTE: these fields can be turned on and off and labels changed under Page Layouts.
If the Position Title is updated on the Profile, it will propagate down to Addresses with the exact same Position Title that was changed. Similarly, the Company Name is updated, it will propagate down to non-linked Addresses with the exact same Company Name that was changed.
If the contact has created a Username for use in the website, it will be displayed. You can change it if it is already set, but you cannot set it if it is blank. The contact must create their account in the website initially, in order to connect a Username and Password to their contact record in the database. There are now separate controls in the Profiles drop down menu for Change Username and Change Password functions, and will be discussed later in this Profile section. NOTE: If the Username box is red, that means there is an issue with their account and you will need to Contact Support to get it sorted out.
The Addresses section allows you to manage the contact’s mailing addresses. Each address is listed in a box with the Type of address listed at the top. Other Address Types can be added to this dictionary by a Client Admin. To add an address for the selected contact, click the “Add New Address” button found at the top right of the Address control.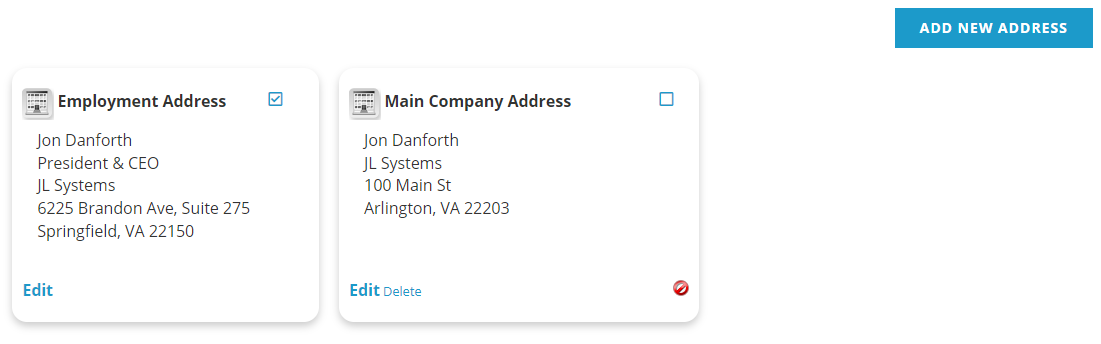
Displayed data can be changed in Edit mode, so long as you remember to click the “Save Address” button.
An Individual’s address can be set to one of his/her employer’s company addresses. In Edit mode, click the arrow in the Employer Address To Link To: field to select a company address if it is already in your database. When the address is updated in the Company’s Profile, the changes will cascade down to all employees whose addresses are linked to it. Thus, any edits to a Company Address should be made in the Company record, not in an employed Individual’s record. To disconnect an Individual’s record from a Company Address, activate the drop down list in Link Address To: and choose “- - - Select - - -“ which will allow you to update the contact’s address to one other than the Company’s.
Each address box has a check box at the top right. This Default Address check box is used to designate the key or default address to be used. One address must be designated as the default address, and it cannot be deleted. It can be edited, or a different address can be made the default in order to delete it. An address that has been used in an invoice or similar process cannot be deleted. To delete an address, click on “Delete” at the bottom of its box.
The In Dir check box is used to indicate which, if any, address the contact wishes to be published with his/her name in the Member Directory, if your membership directory utilizes this option.
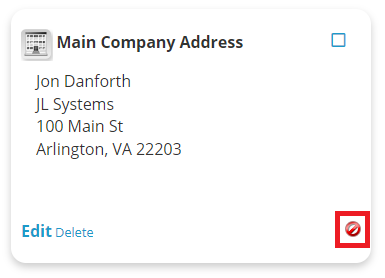 The Hold check box is available in Edit mode, and should be checked by staff when a contact’s address has been deemed to be a bad address. An icon appears at the bottom right of the address box for any address put on Hold. In addition, an alert message appears on the contact’s profile upon subsequent logins to your website prompting the contact to update their address. If either the contact or staff updates the address, it is automatically taken off of hold.
To add notes to an address, go into Edit mode and use the Notes field.
The Postal/Zip Code section in the AMS is programmed to automatically populate the corresponding City, State and County names into those fields once a U.S. zip code has been entered. That pre-filled data can be overwritten when necessary. NOTE: City/Zip information added in the AMS's address screen will be added to the drop down list for subsequent use.
NOTE: Names on address can be different from the name on the Profile. If a name on an address is the same as the name on a profile, when the name on the profile is updated the name on the address will also be updated. However, if the name on the address is different from the name on the profile, when the name on the profile is updated the name on the address will not be updated.
The Communications section allows you to specify phone numbers, fax numbers, email addresses and website addresses for the contact. To add an entry for the selected contact, click the “Add New Communication” button found at the top right of the Communications control.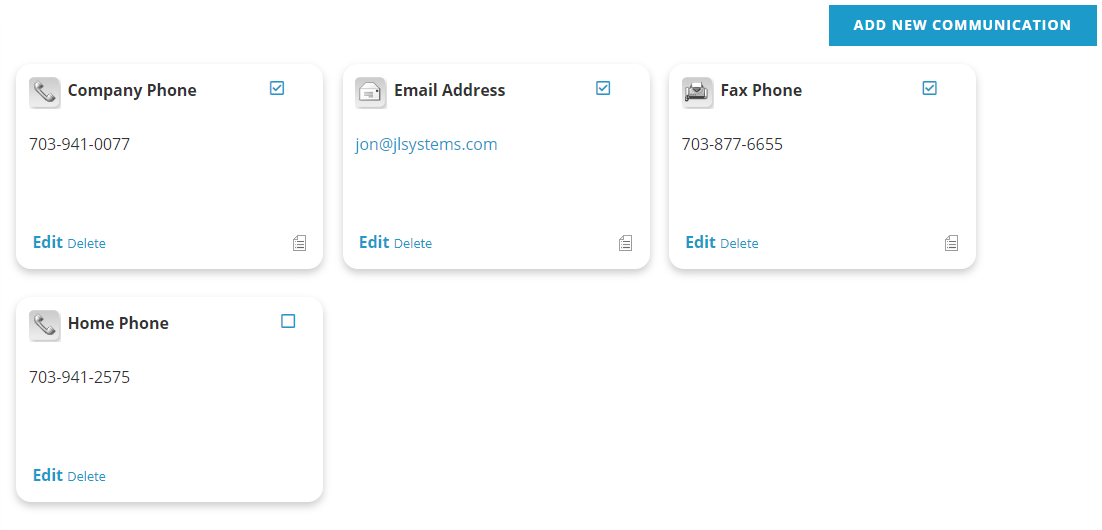
You can designate a Key phone, fax, email and website for each contact either in Edit mode or by checking the box at the upper right corner of the record. There is no requirement that a communication record be set to key, and each can be deleted if desired. The ability to delete a key email by the individual in your website can be disabled by a Client Admin.
The fields available when editing or adding an email address are in the next screen shot. These fields can change when other Communications types are selected in the Purpose field, but are very similar to those seen here.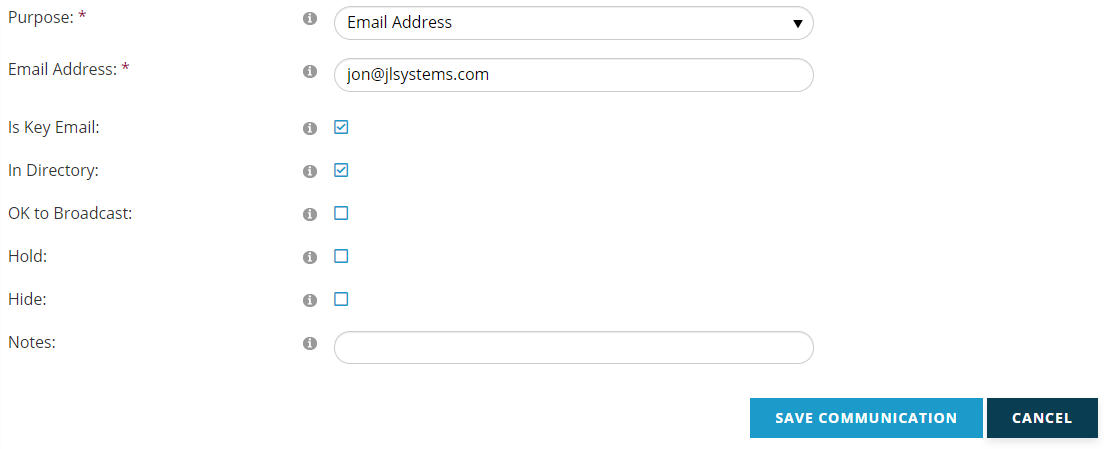
If the In Directory check box is selected, the communication record has been approved by the contact for inclusion in your association’s directory.
An email that is checked for “OK to Broadcast” is included in the Reporter blast/bulk emails. If this box is unchecked, the contact will not receive any email via the Reporter. All other processes will continue to send email, such as invoices and shopping cart confirmations. If you use the Opt In/Out functionality for unsubscribing to various emails, do not enable this check box in the website and do not uncheck it for any individuals.
Types of Communications in the Purpose drop down menu can be expanded to include Types like Facebook, LinkedIn and more. The Community Type dictionary is available to a Client Admin.
If an individual’s contact record has a Canadian address or an email extension that ends in .ca, then due to the Canadian Anti-Spam Law (CASL) the person must explicitly opt in to bulk/blast email communications. A message similar to the one below will be displayed when editing these email addresses.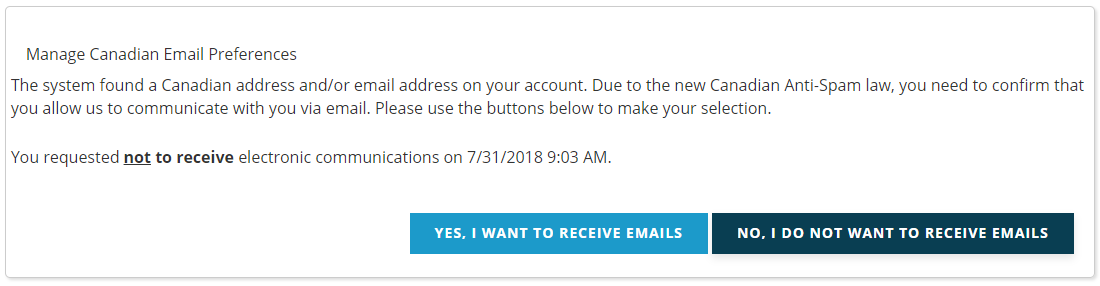
A message also appears if a Canadian email address is entered by a contact on your association’s website.
At present the CASL does allow email to be sent to anyone with a financial transaction in the immediate past 3 years, thus the system will continue to allow bulk/blast emailing to those that have not indicated an email preference that has a recent financial transaction. CASL does not prevent emailing confirmations and related notices, thus invoices, shopping cart transactions and renewal notices will continue to be able to be delivered regardless of the person’s setting for bulk/blast email.